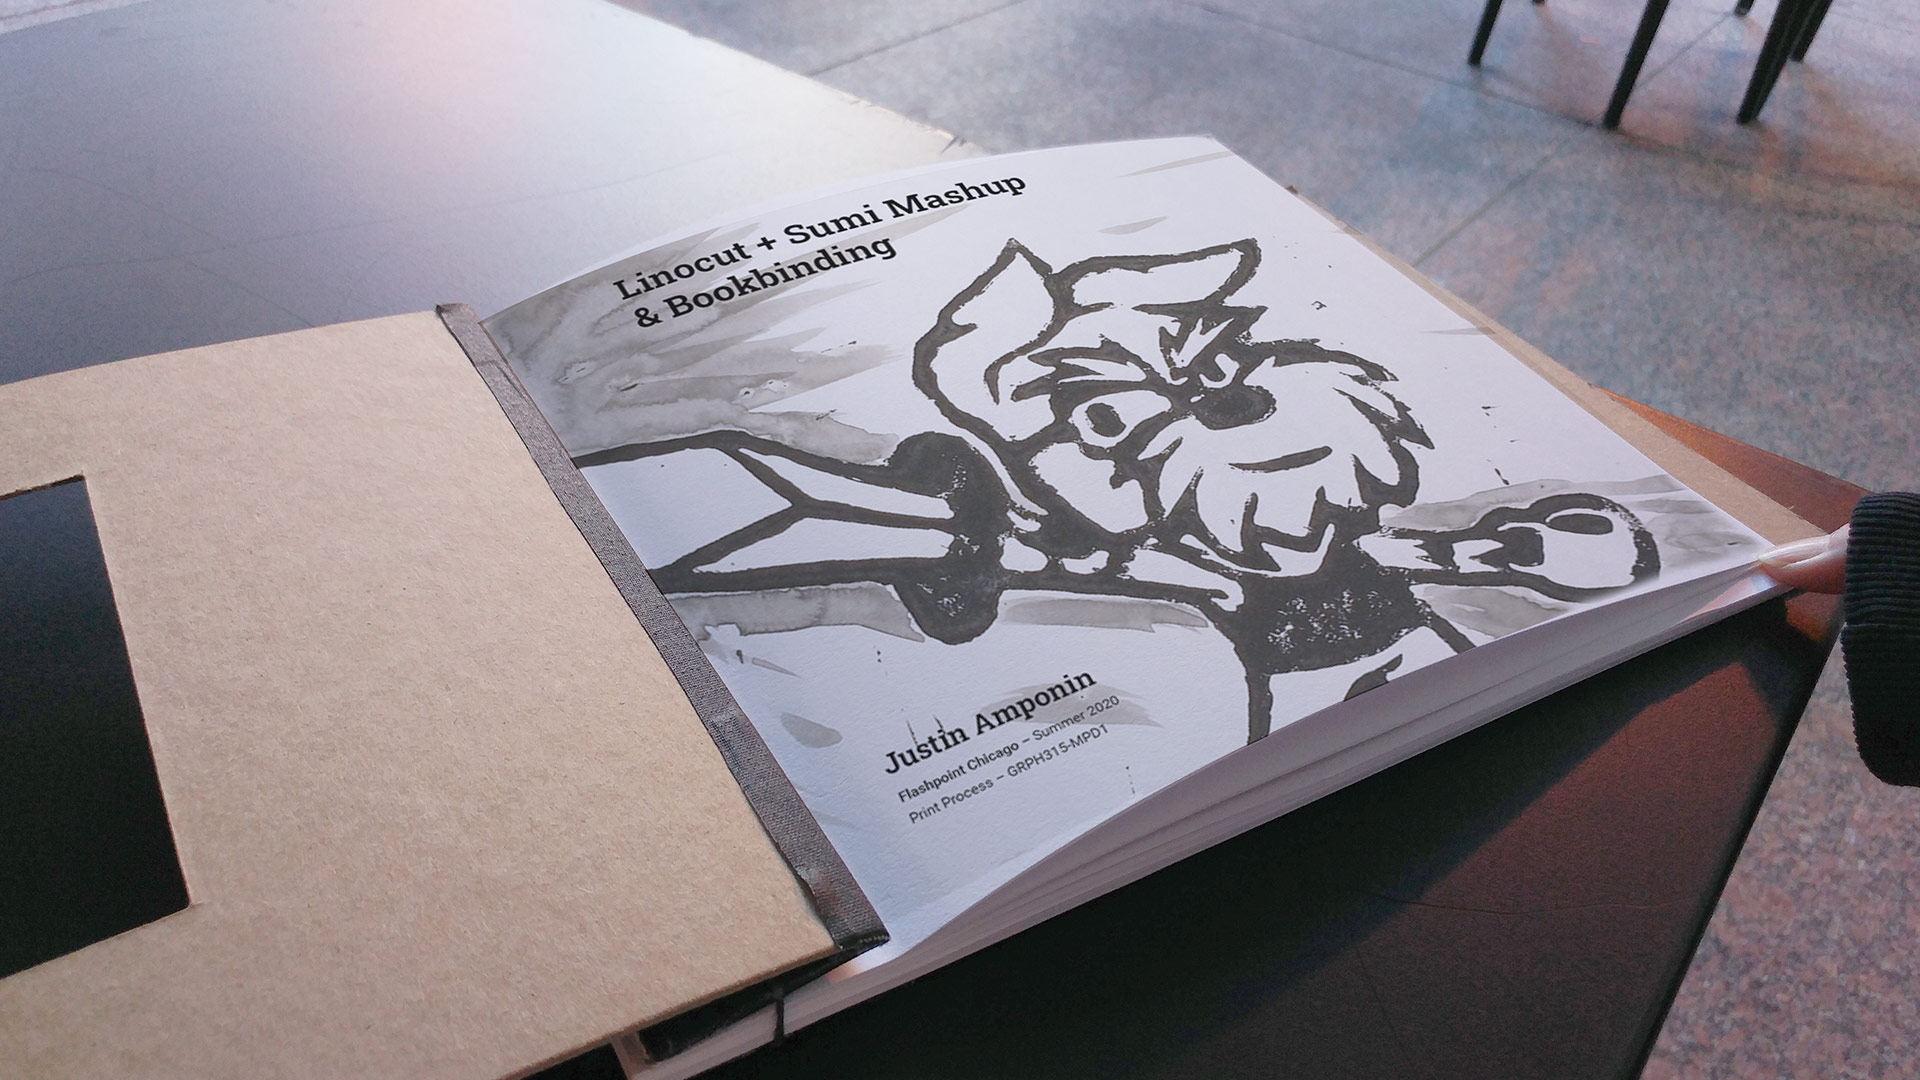

A printmaking project where I create illustrations from other brands I have made, then transfer them into black and white linocut prints followed by adding Sumi-e ink strokes. After the printmaking creation, I bind a book with 30 pages inserted with highlights of my process documentations.
This is a type of project where I don’t know anything about printmaking but with the help of peers and my class instructor, the project was a thorough one. I was happy with the results and glad to add this type to my creative arsenal. Normally I would only do linocutting, but I wanted to do something to emphasize the print, and that’s sumi-e ink.
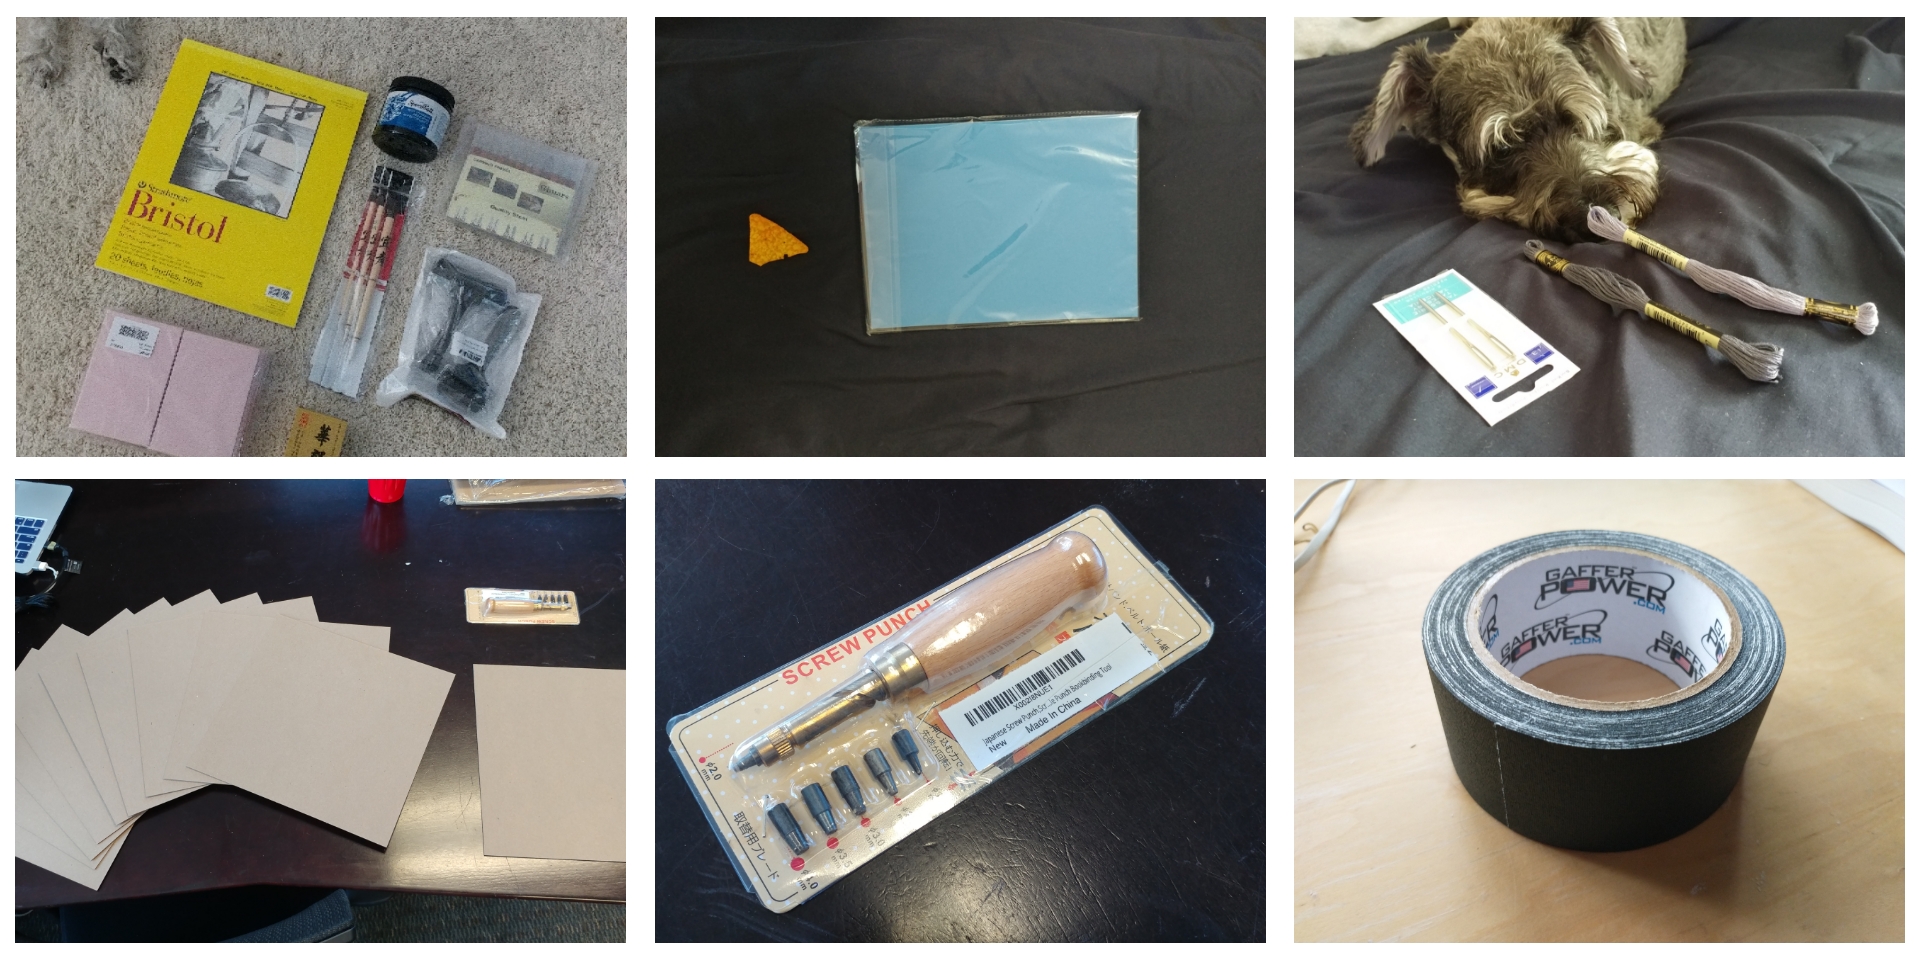
Strathmore 300 Series Bristol Smooth Pad
HRLORKC Rubber Roller Brayer Rollers (2)
Speedball Water Soluble Block Printing Ink (1lb Black)
Falling in Art Blue Linoleum Block (4 Pc 9”x12”)
SGHUO Pink Rubber Carving Blocks Linoleum Block (12 Pc 4”x6”)
Gimars Carbon Steel Wood Carving Tools Knife Kit
MZ001 Hmayart Black Sumi Liquid Ink
Artecho Chinese Calligraphy Brushes Baiyun (3 Brush Sizes)
Grafix Medium Weight Chipboard Sheets (25 Pc 12”x12”)
Japanese Screw Punch
Threading Needles, DMC® 6 Strand Embroidery Floss
Bookbinding Tape by Gaffer Power (Black)
Jan 2021 - Mar 2021 (11 Weeks)
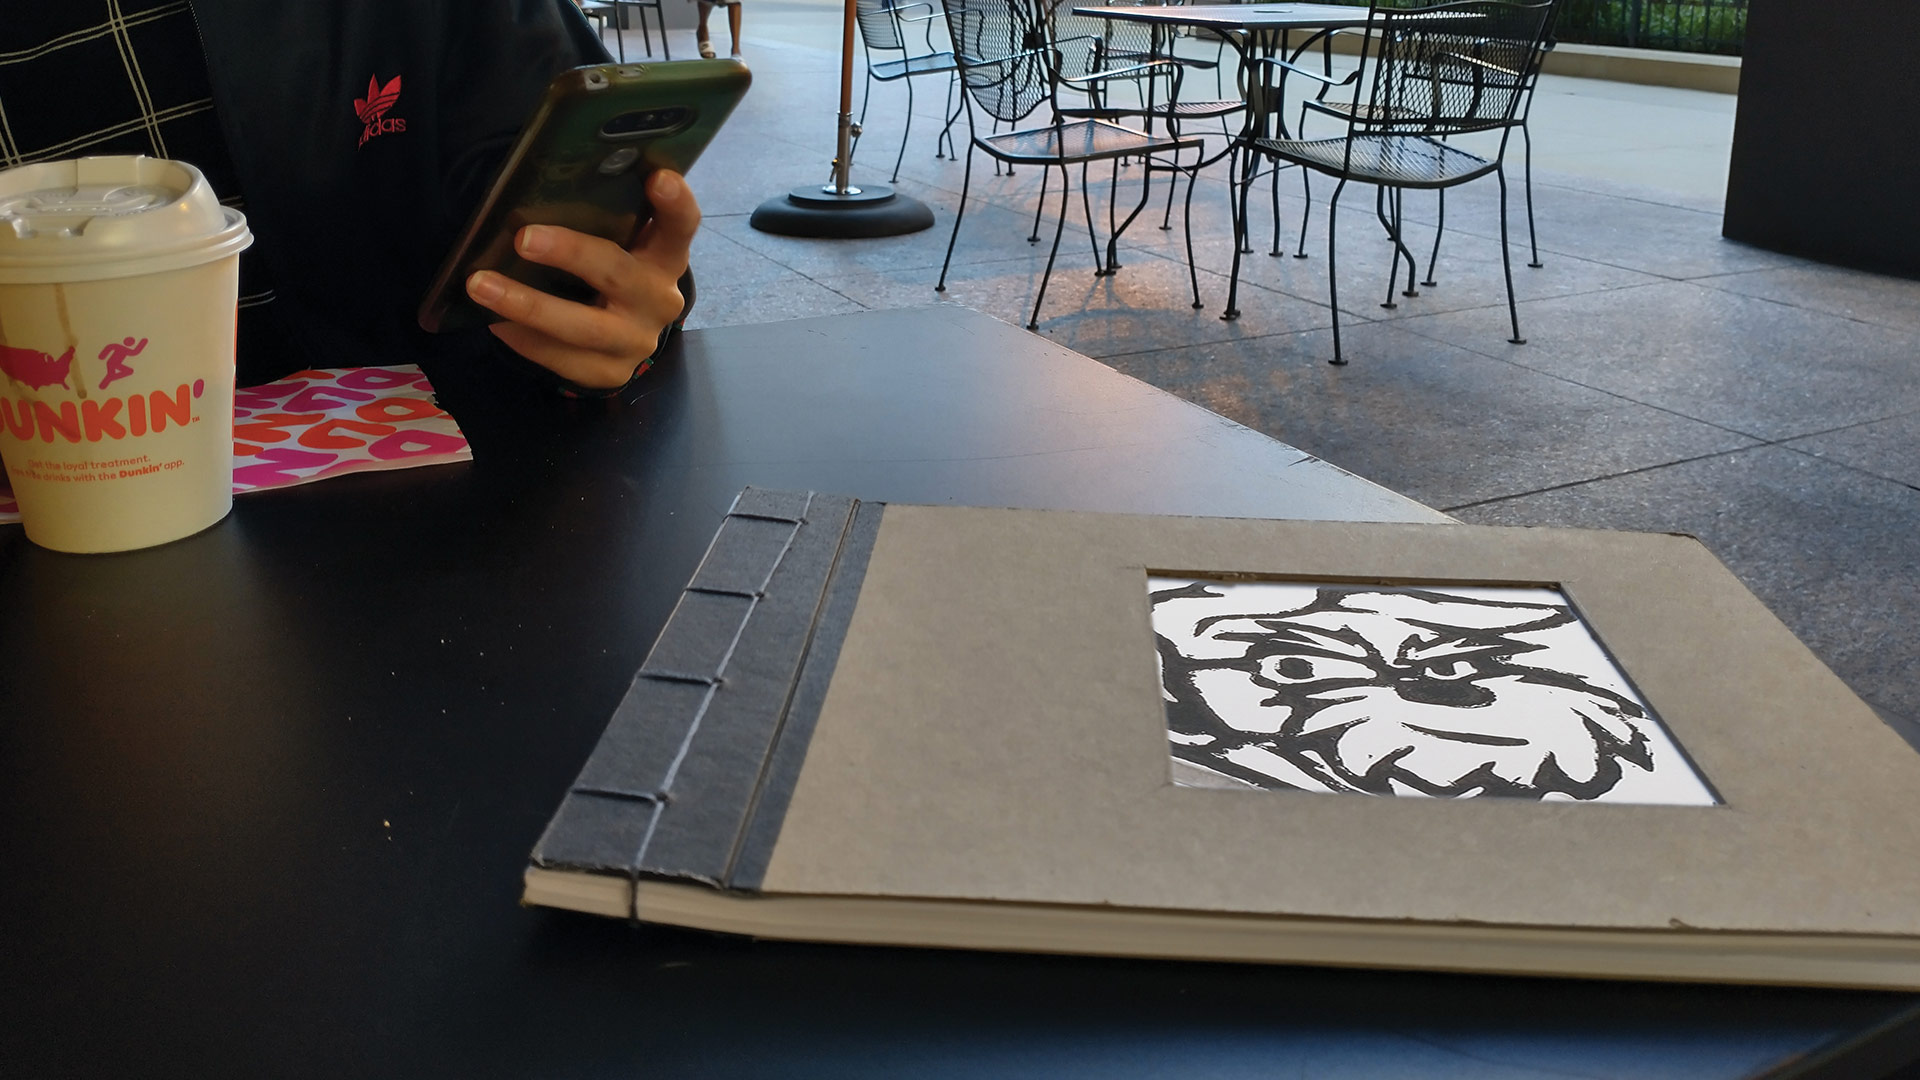
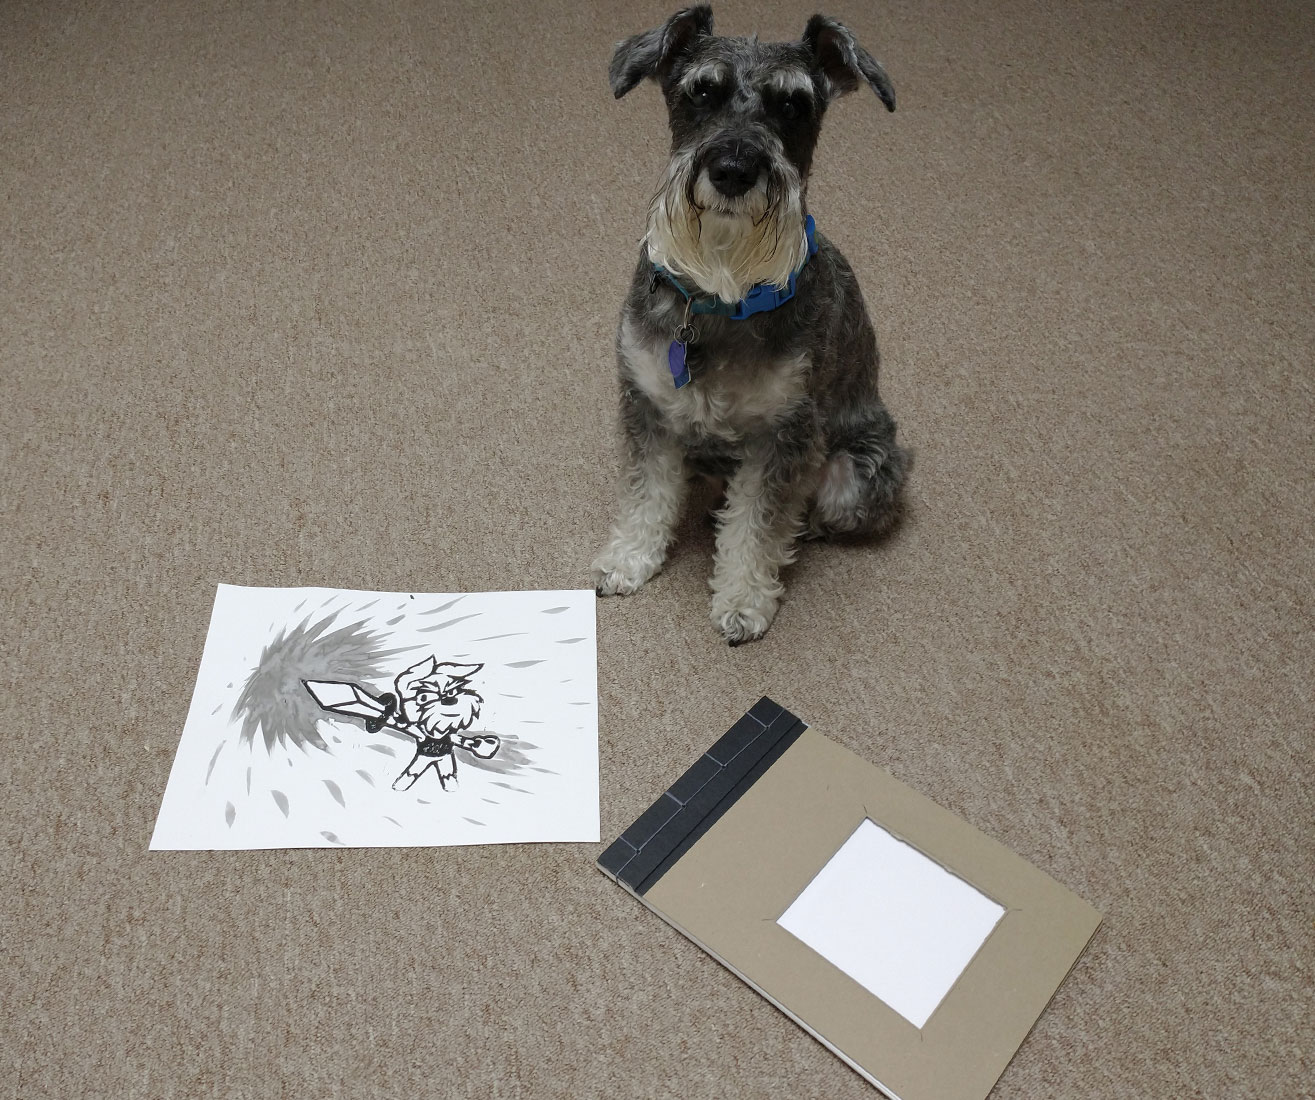
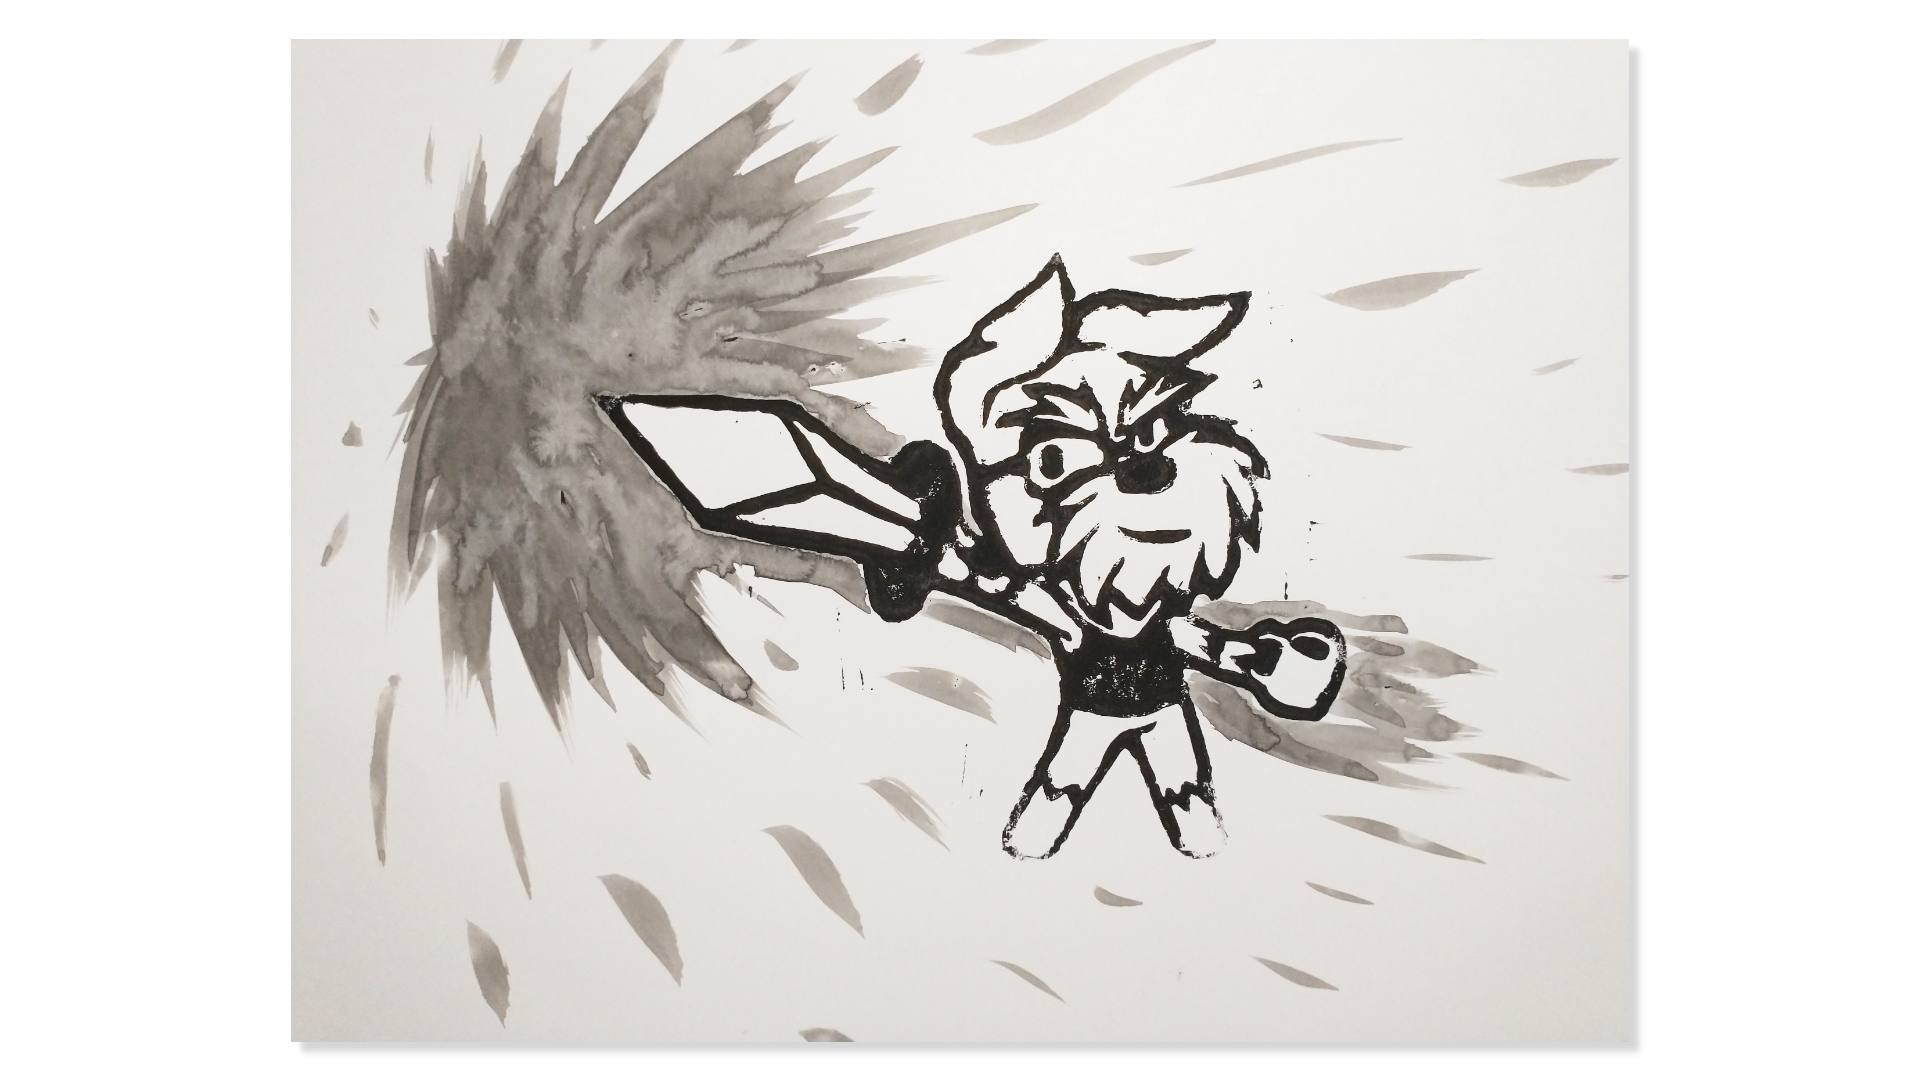
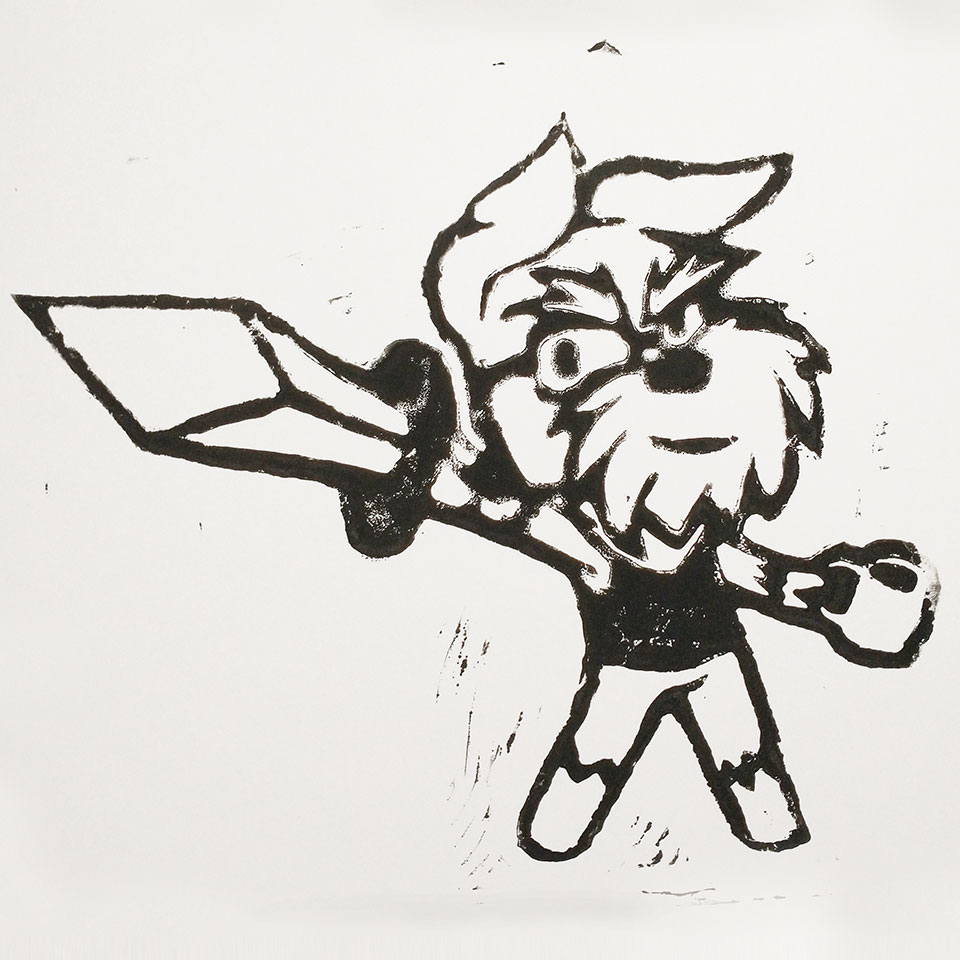
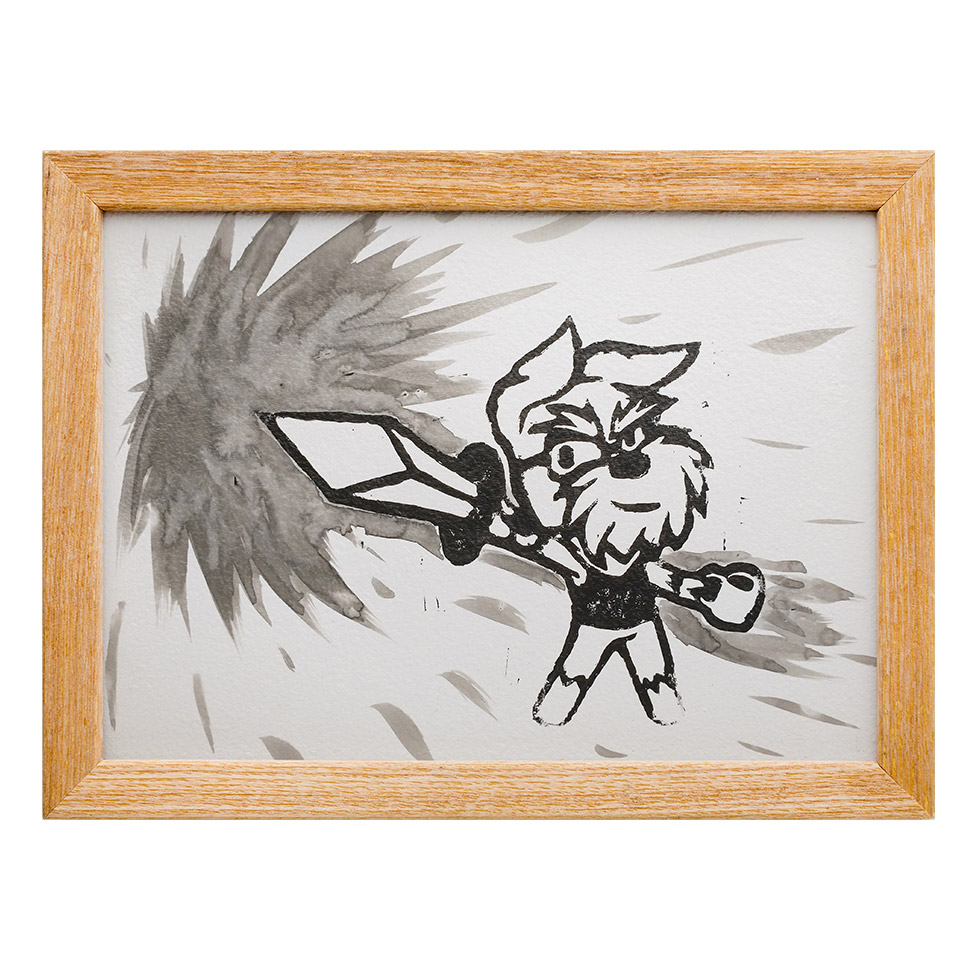
This was inspired by animated characters swinging their weapons creating that “swoosh” effect like what you see in video games. I believe that is something I can do with sumi-e ink. This is also the first time I make my brand more animated as I created my logo with a full body and expressions. It was also inspired by animated characters and illustrations. I also enjoy covers with cut-outs, it makes the book stand out from the others.

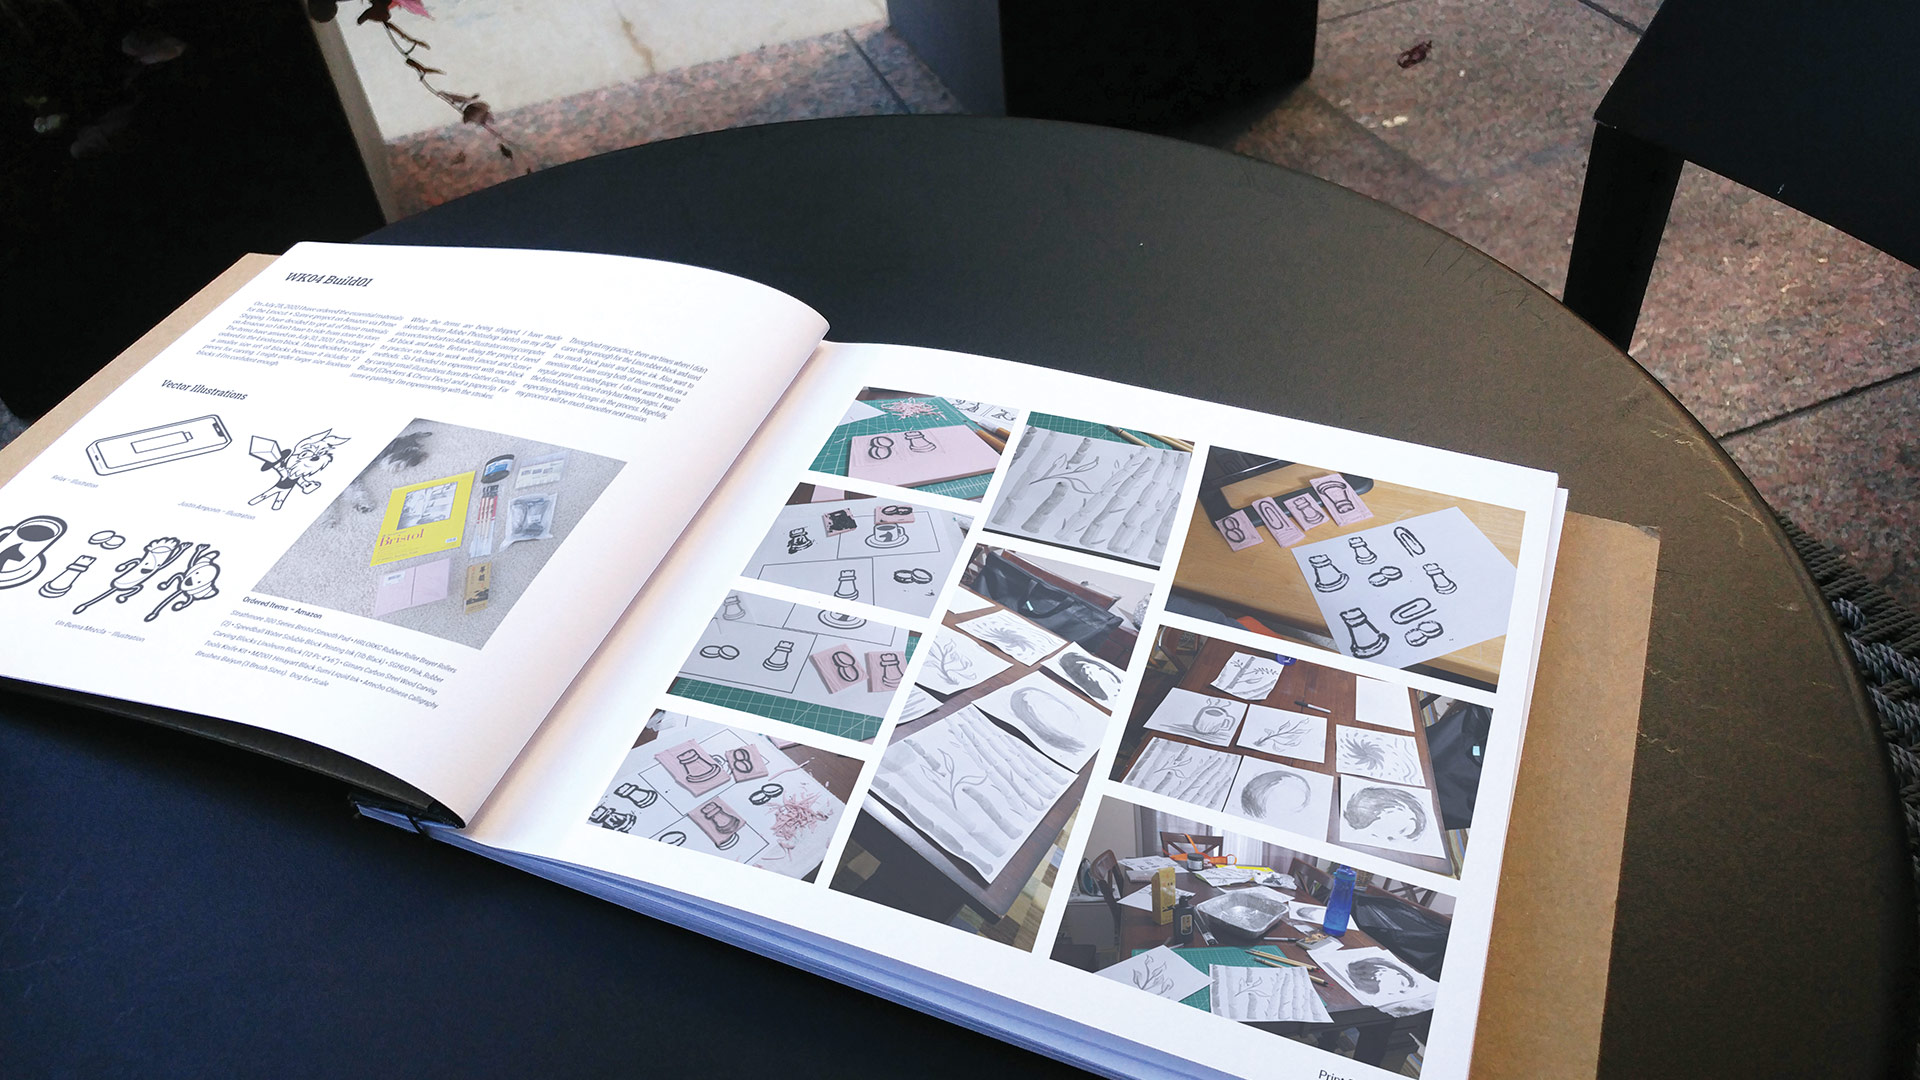
Before starting the printmaking process, I have to order all of the materials I need to get my linocut, sumi-e, and japanese book binding. Most of the orders are from Amazon.
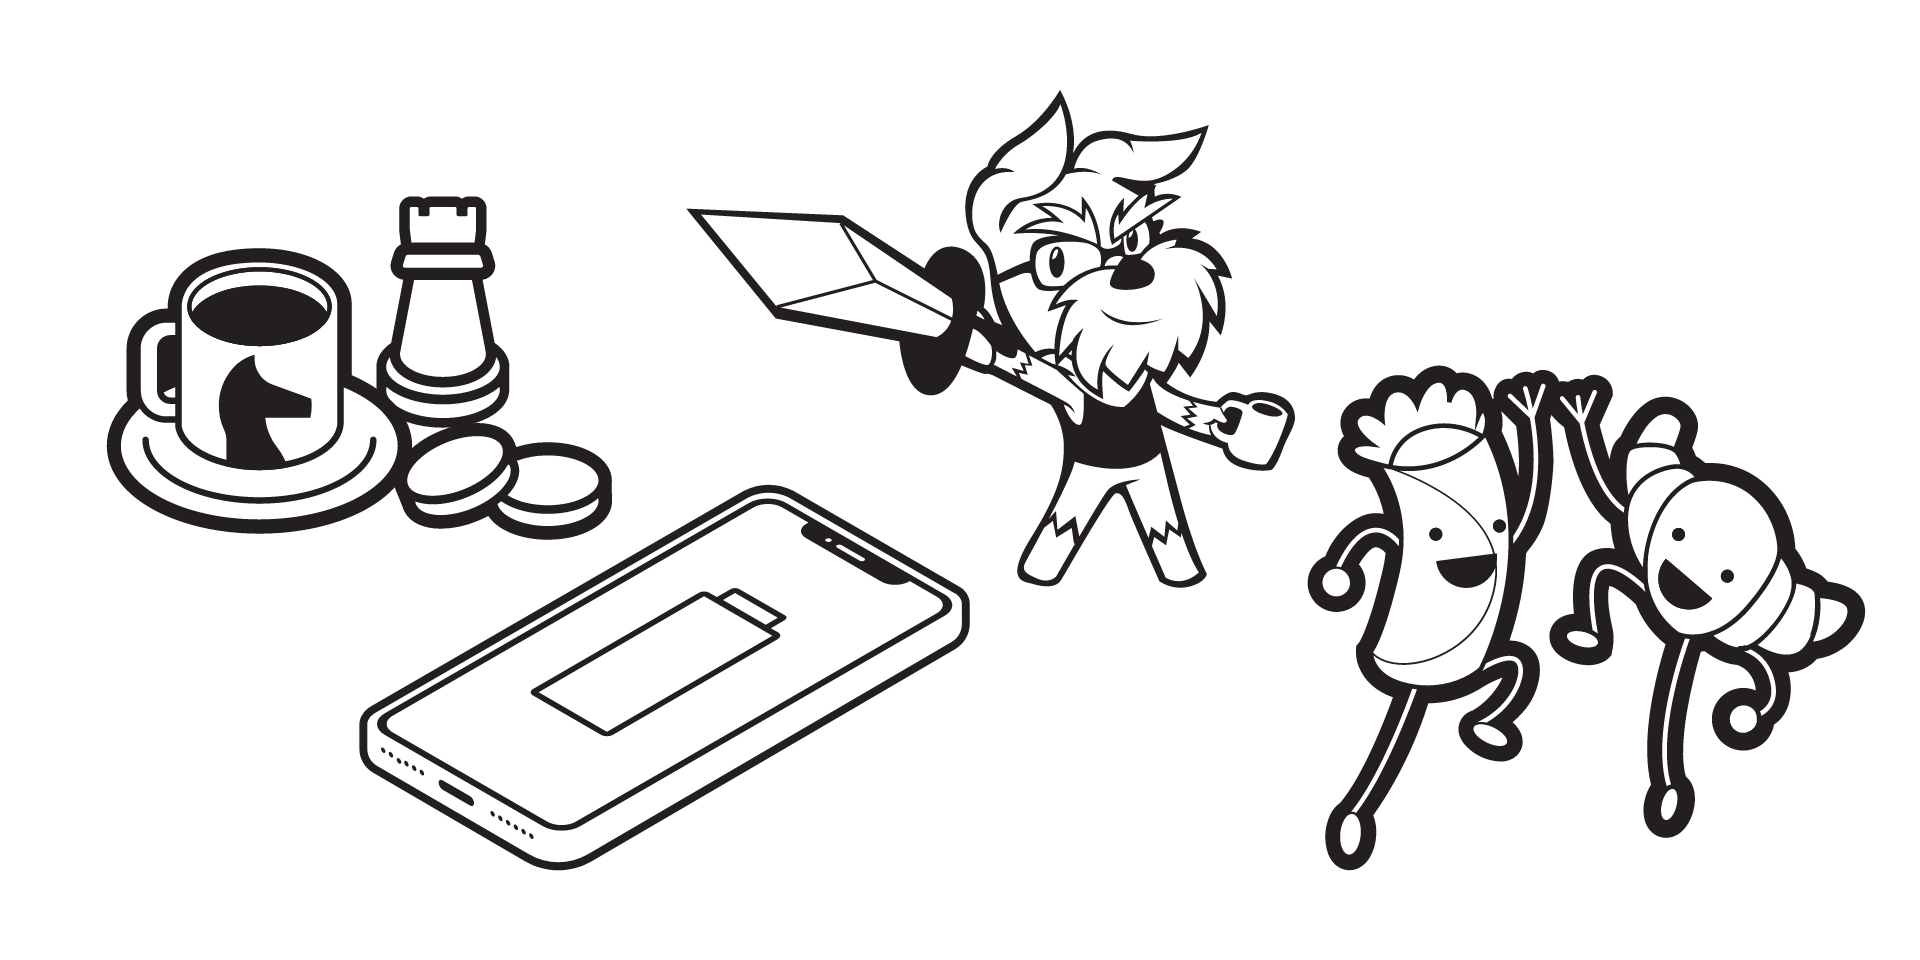
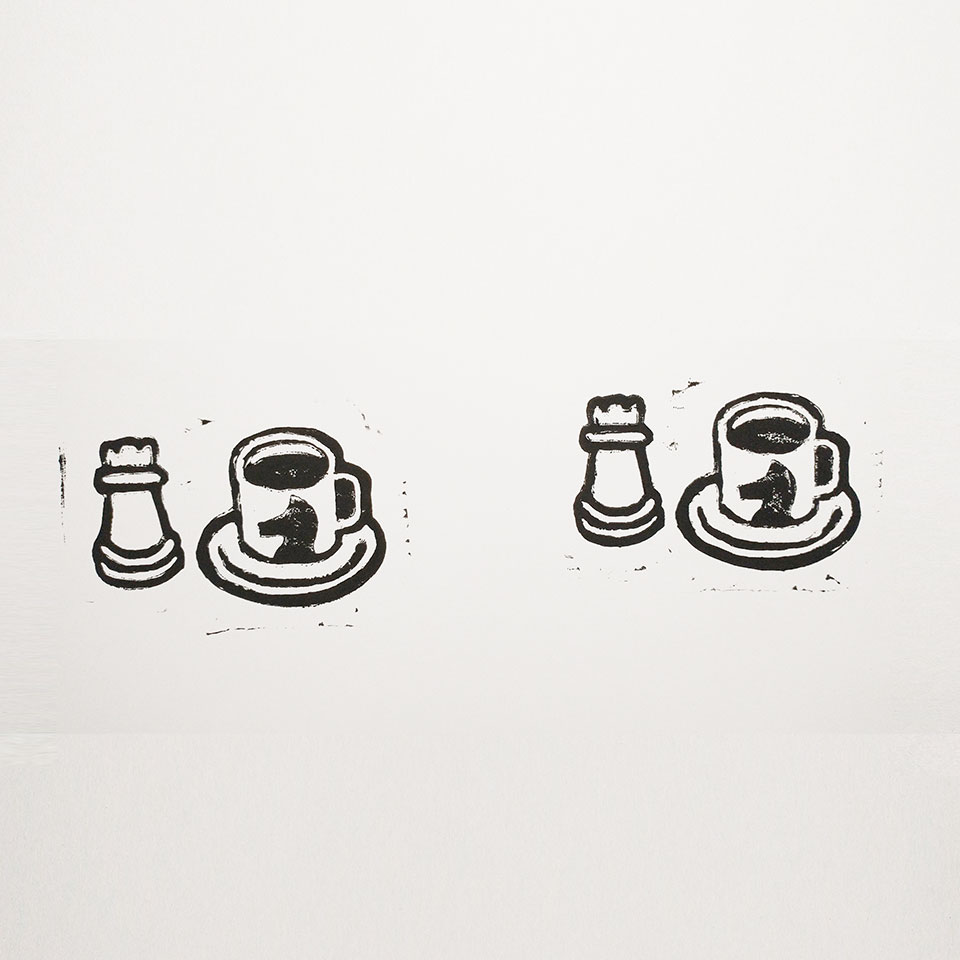
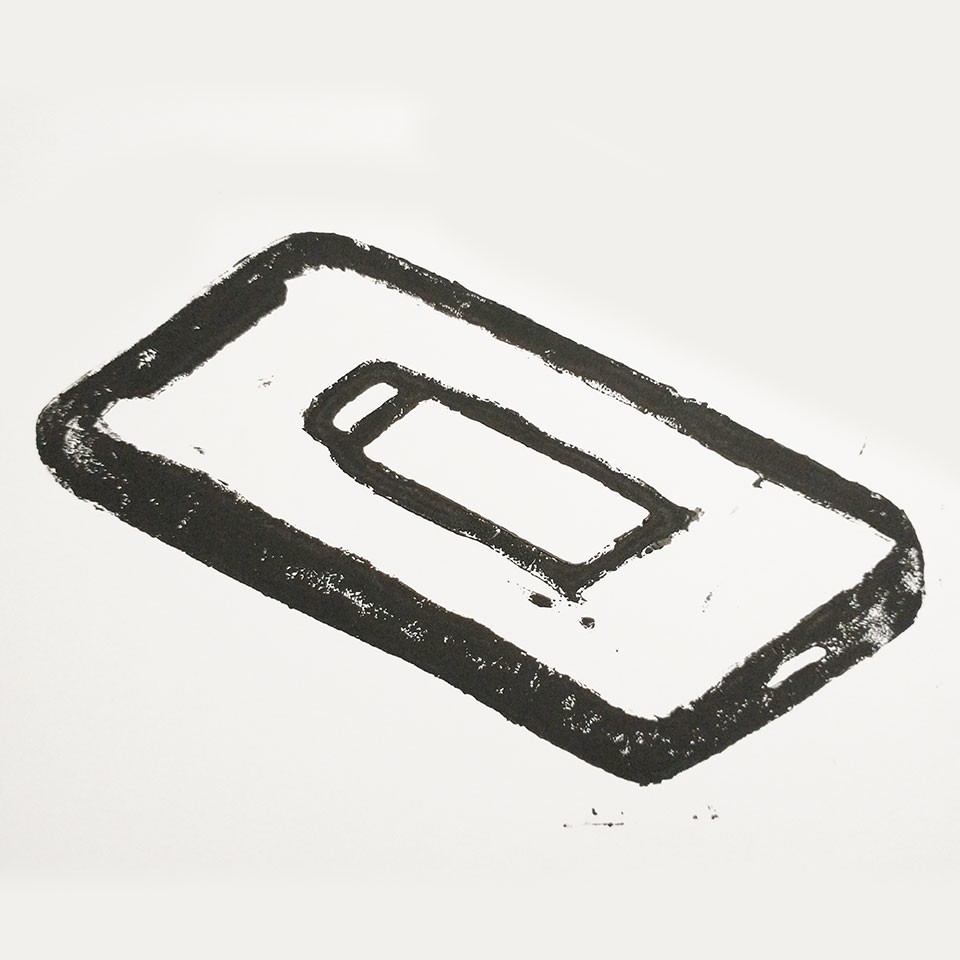
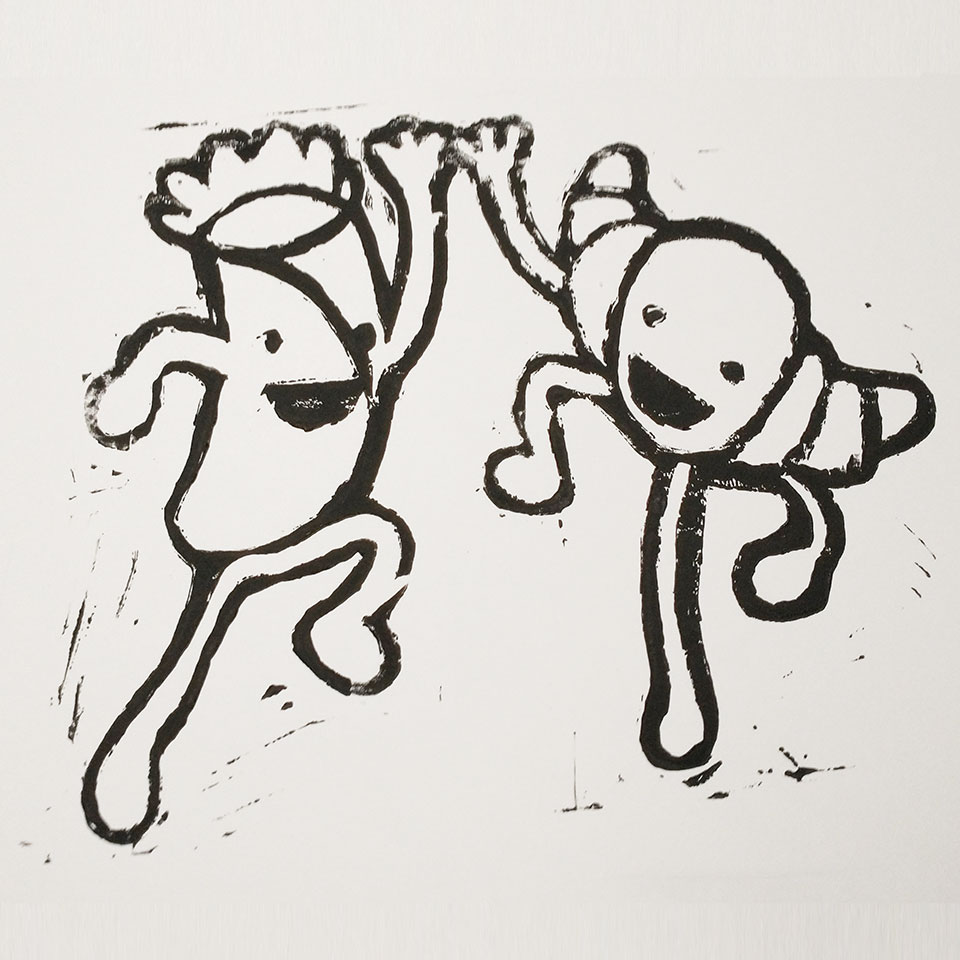
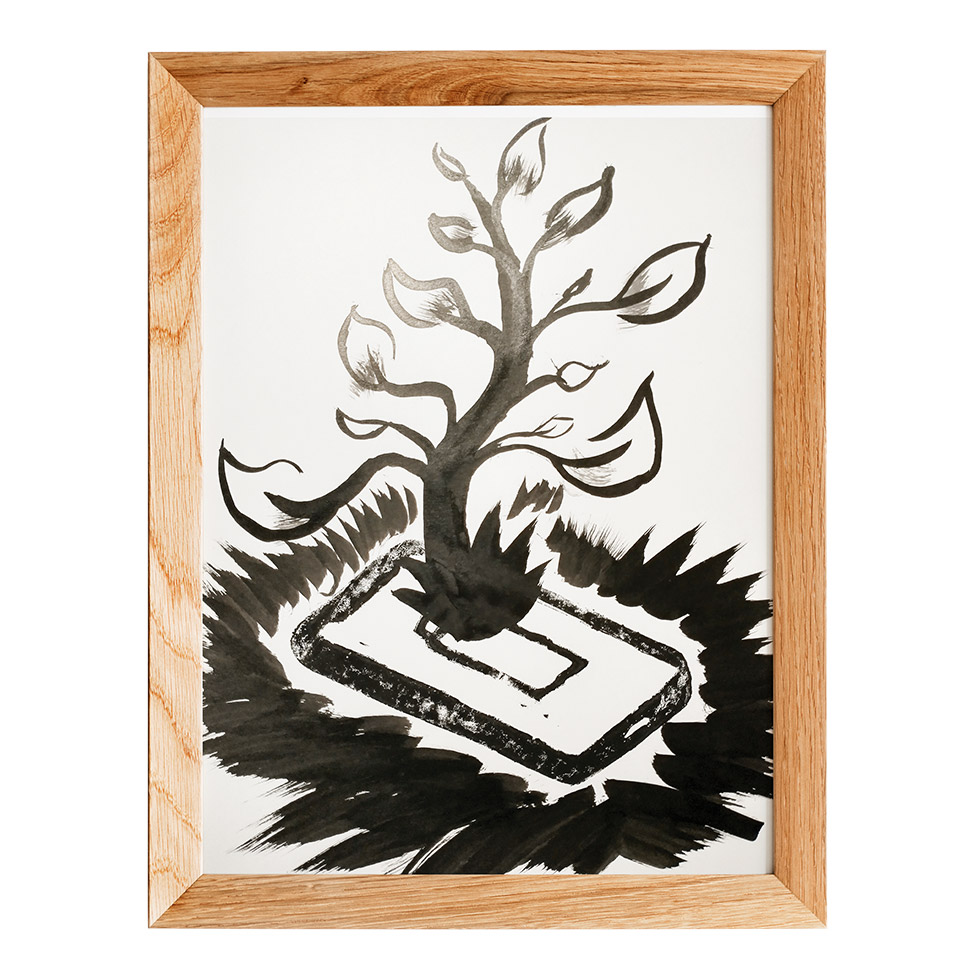
While waiting for my materials to arrive, I have created vector-based illustrations from existing brands I have done before like Relax, Gather Grounds, and Un Buena Mezcla. I had an idea for my brand mascot, instead of just the headshot of the logo, I have decided to make him into a full body with some coffee and a sword. I liked this idea so much, I decided to have that kind of illustration as another asset of my personal brand. All of the illustrations are all black and white to make sure the carving with the linocut is all smooth sailing.
After researching on printmaking and how other artists do their lino cutting and bookbinding. I have made some rough sketches as quick references on my game plan once all of the materials have arrived.
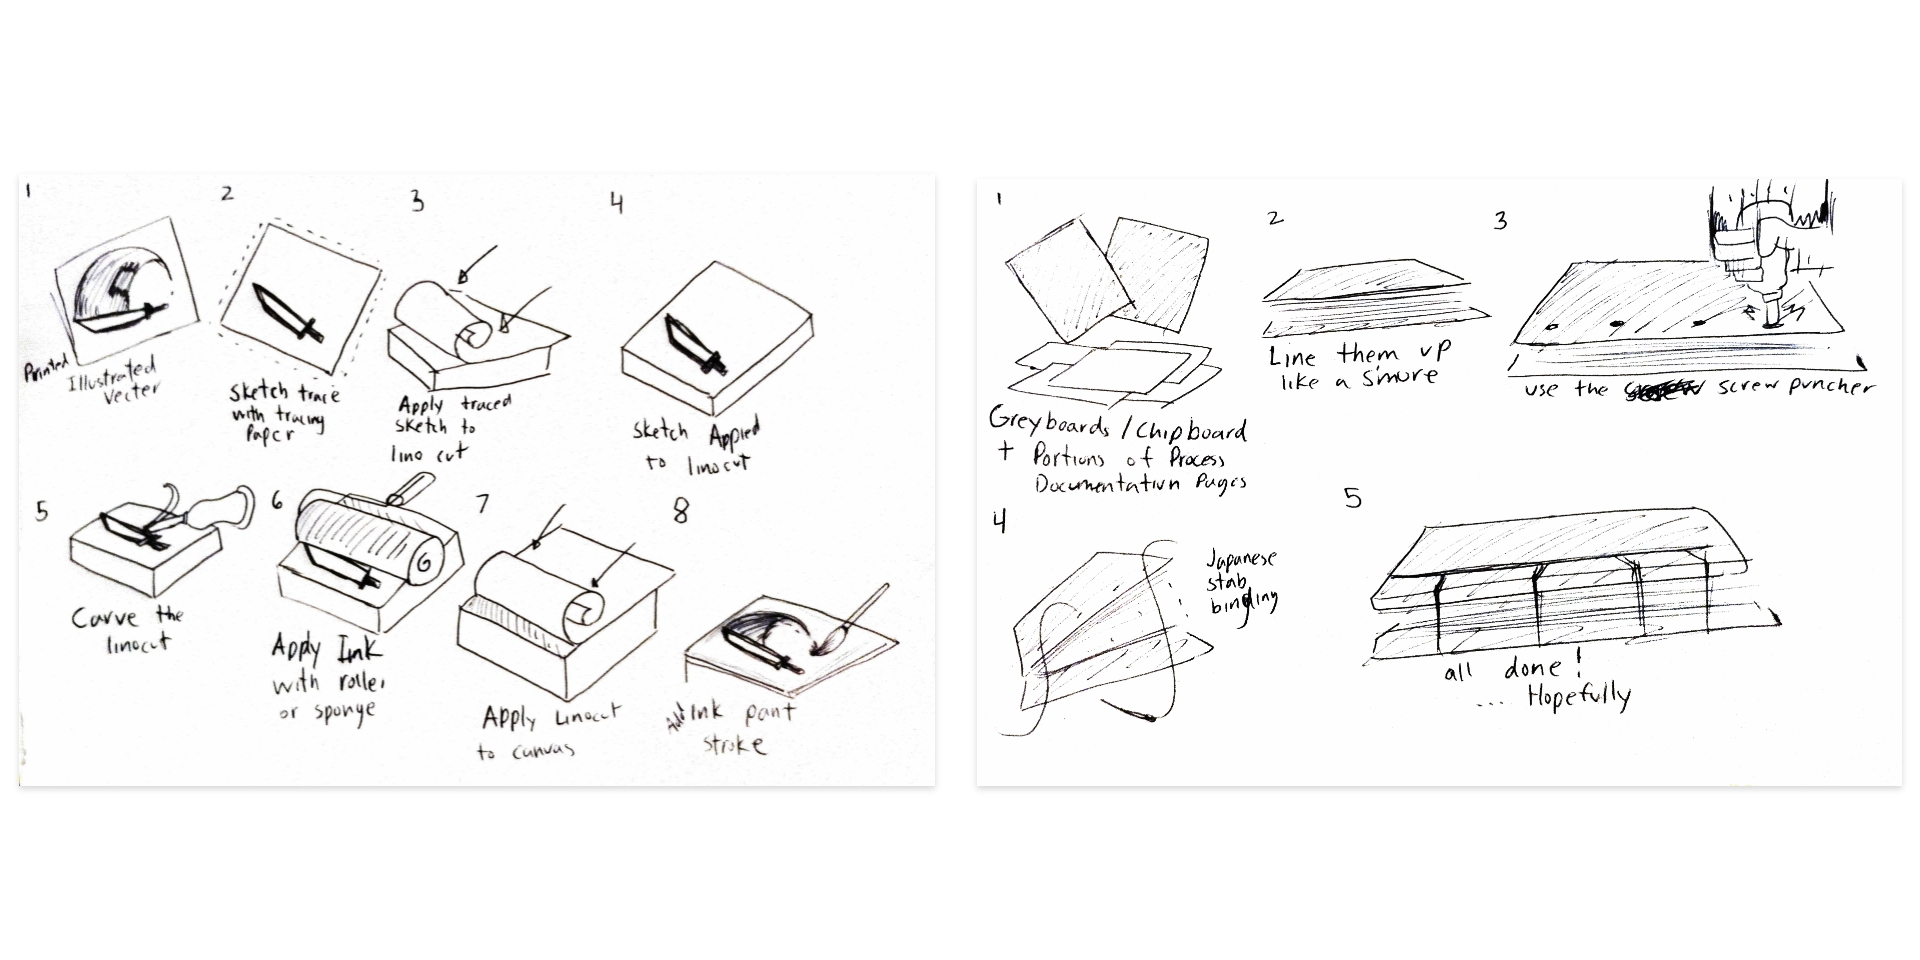
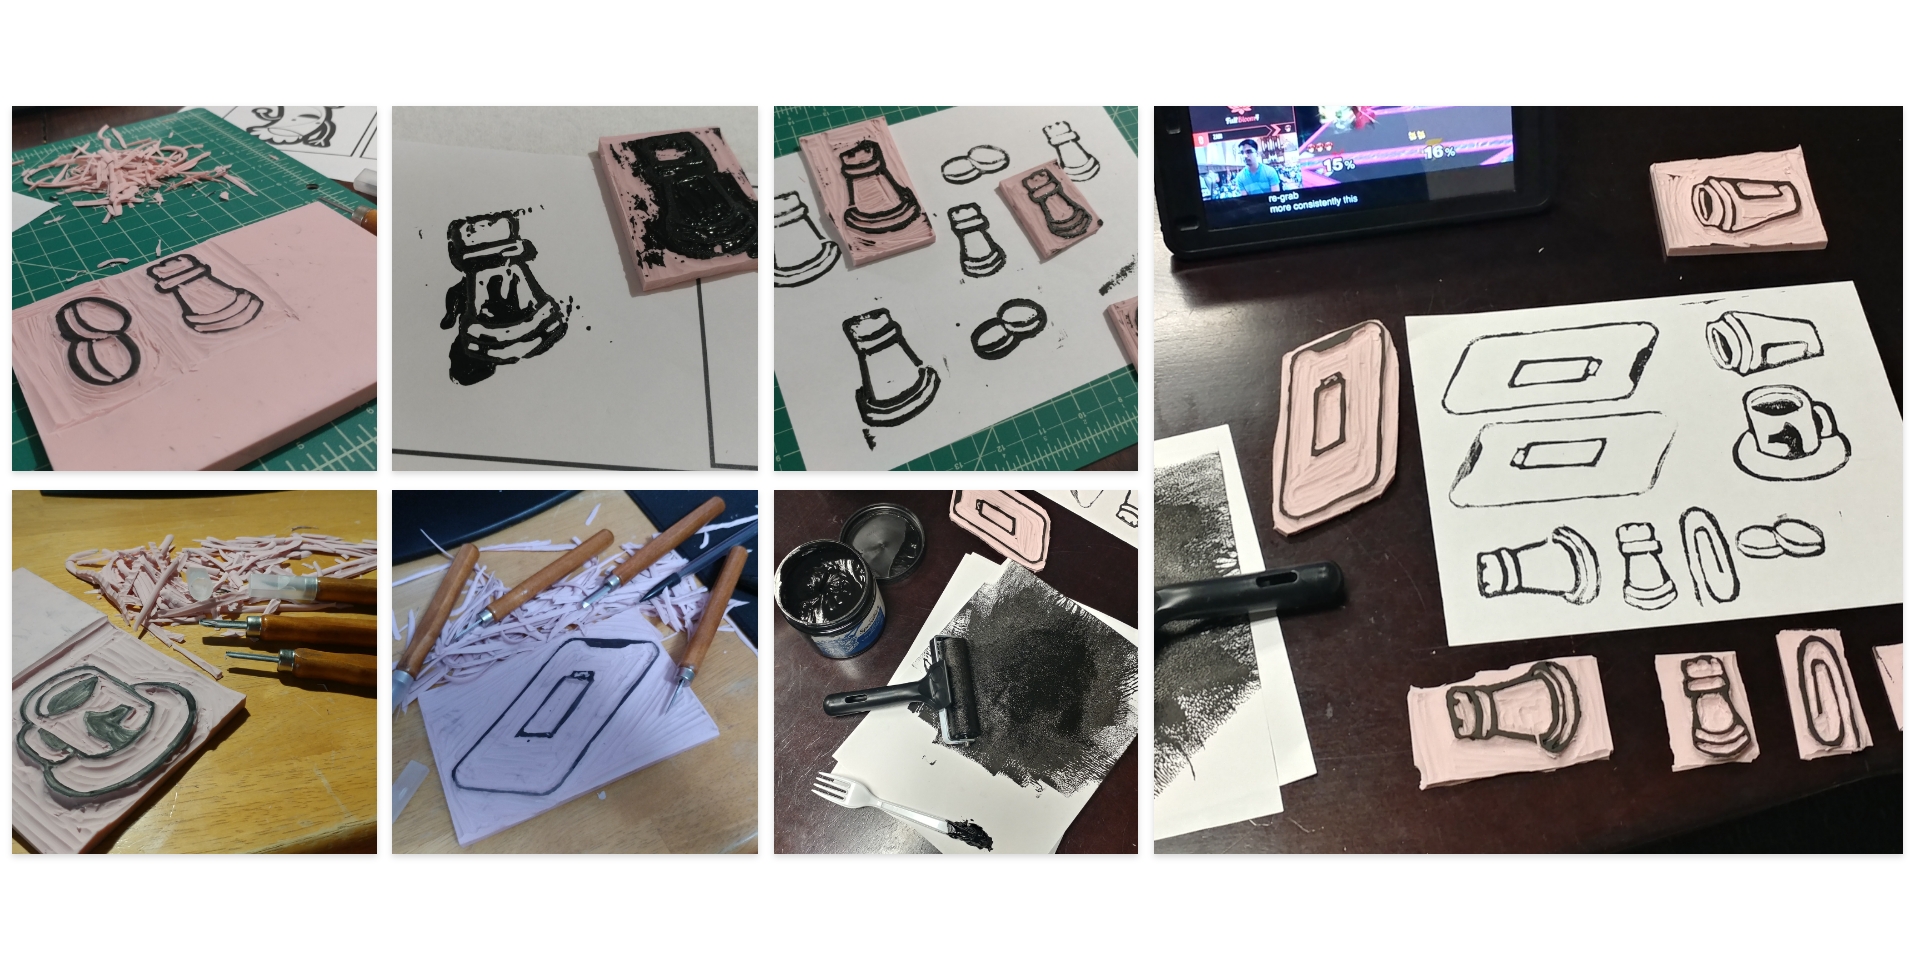
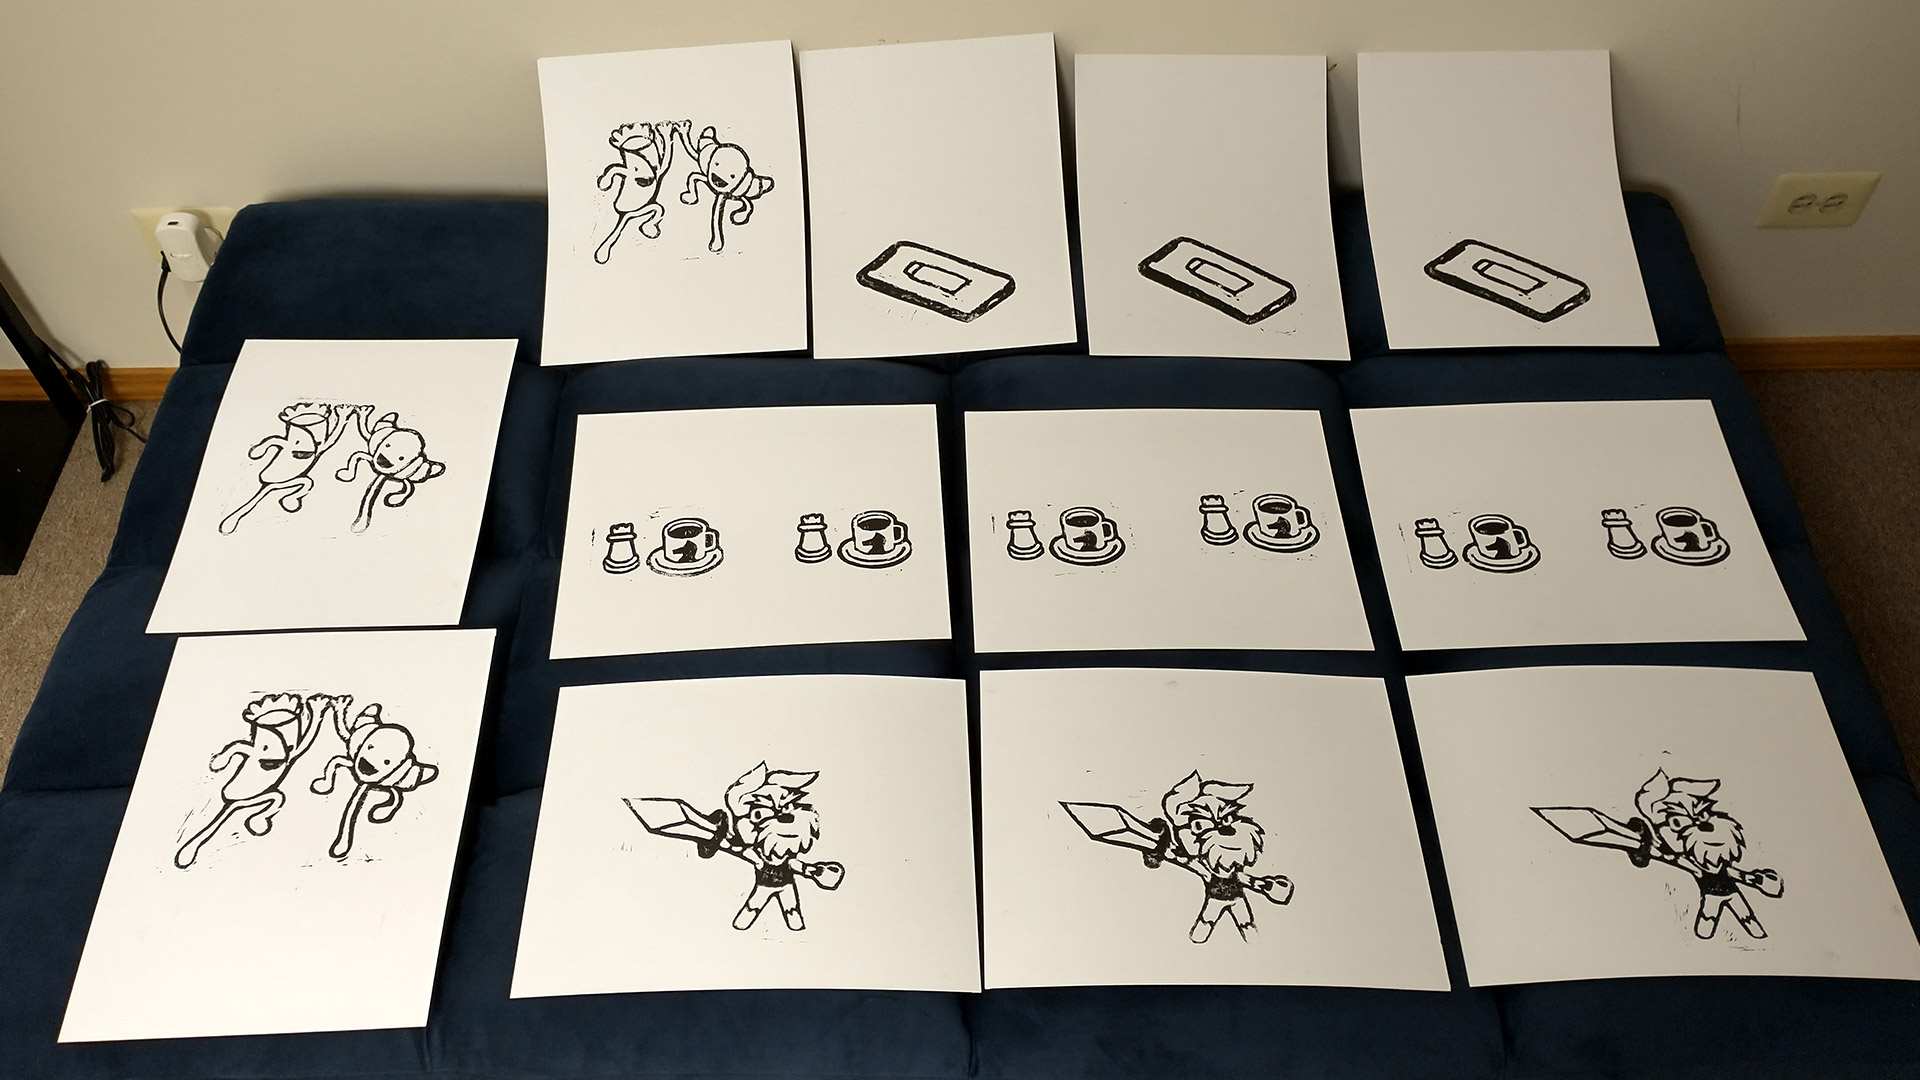
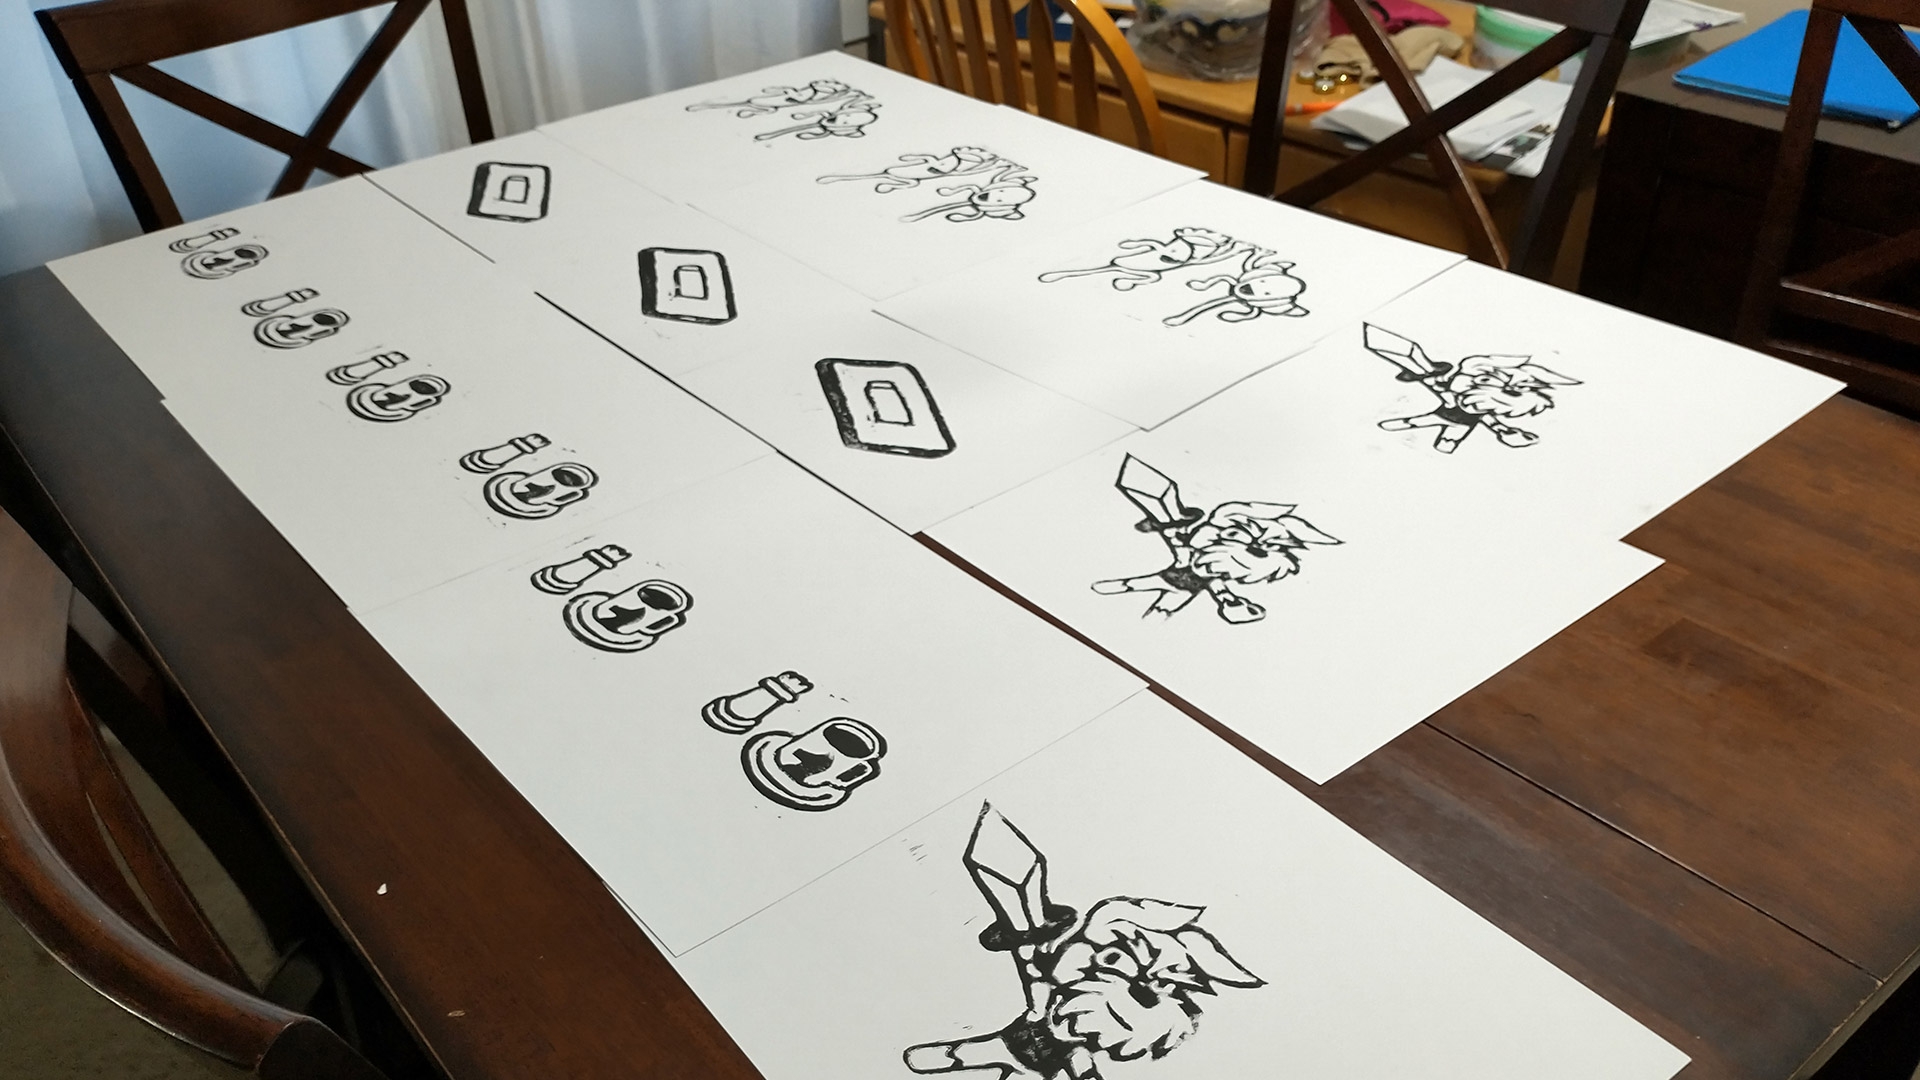
It was overall a great experience and practice as a beginner. I first printed out my vector-based illustrations in a mirrored perspective, then I traced it with tracing paper. Next I applied the tracing paper to the block thus the sketch is transferred to the block. After it was applied, I used a permanent marker to make the carving easier in my opinion. Then I started to carve the block. No hand injuries but a lot of time was put into this round. I used the smaller linoleum block as practice. I have carved a couple of blocks until I had the one I’m good with. Some of the details of the illustrations have to be removed during the process. Then I used my roller and applied a good amount of ink to the carved block and finally pressed it to uncoated printing paper like a stamp.
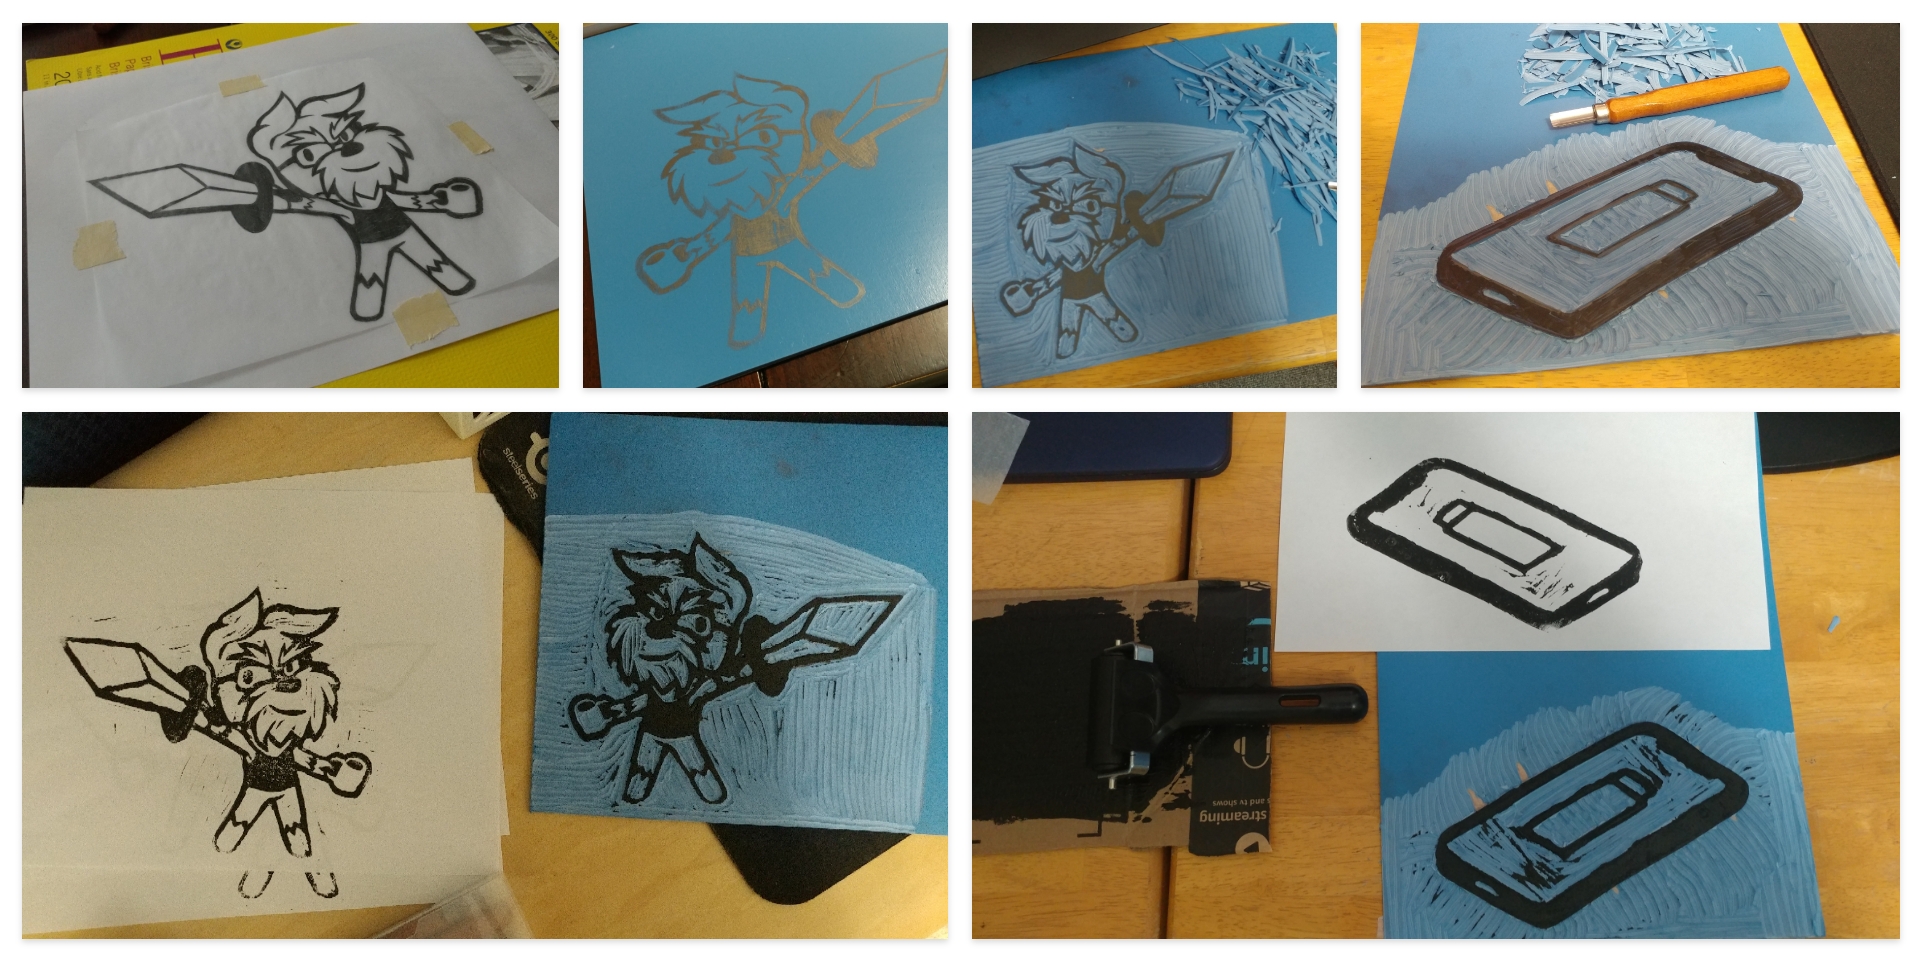
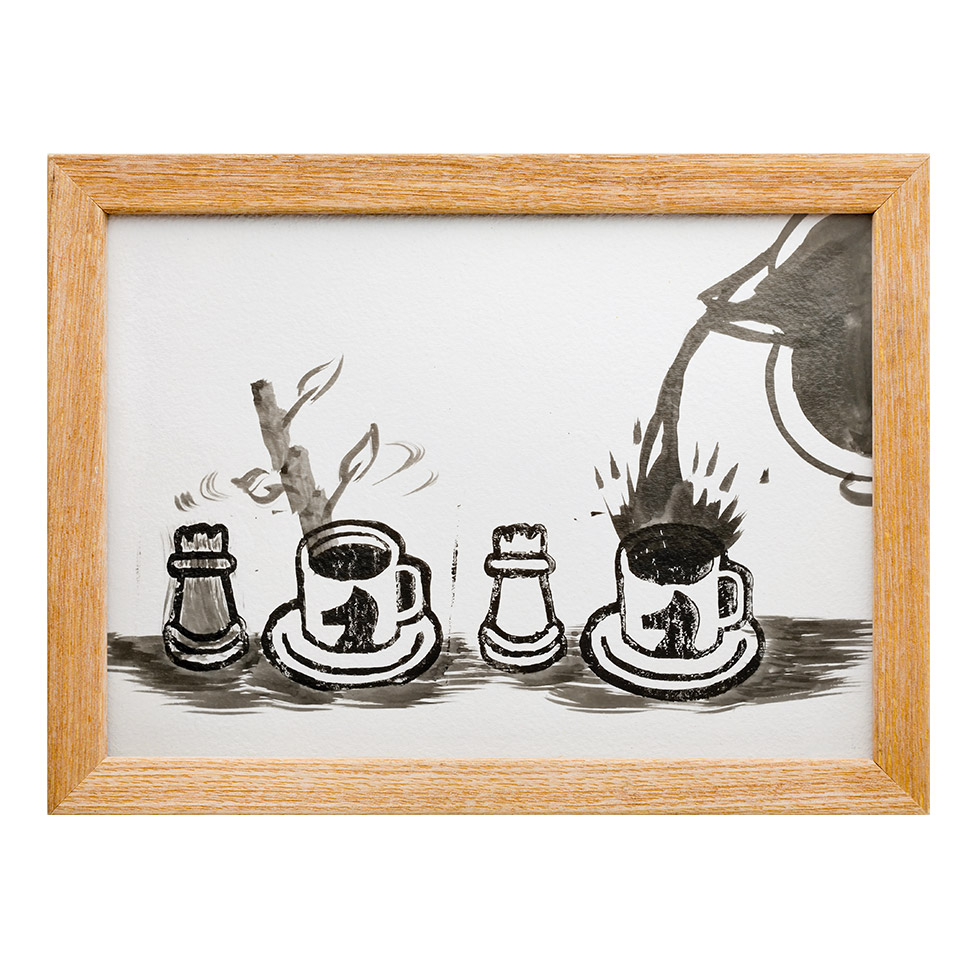
During this second round, It was time to finalize the carving block. I used two of the bigger size blue linoleum blocks to do the more detailed carving with Relax, Un Buena Mezcla, and my mascot to retain the details from the illustrations. I feel that the Gather Grounds carving from the small block was good enough for producing. After testing out the ink with the bigger blocks it was time to produce the prints with bristol boards.
When producing, I used the bristol boards to make my final prints. I have used the final carving block once per board except for the Gather Grounds coffee since that needed to be stamped twice. As a result, I have produced three copies of each creation along with an extra copy for my Linocut/Sumi-e mashup asset.
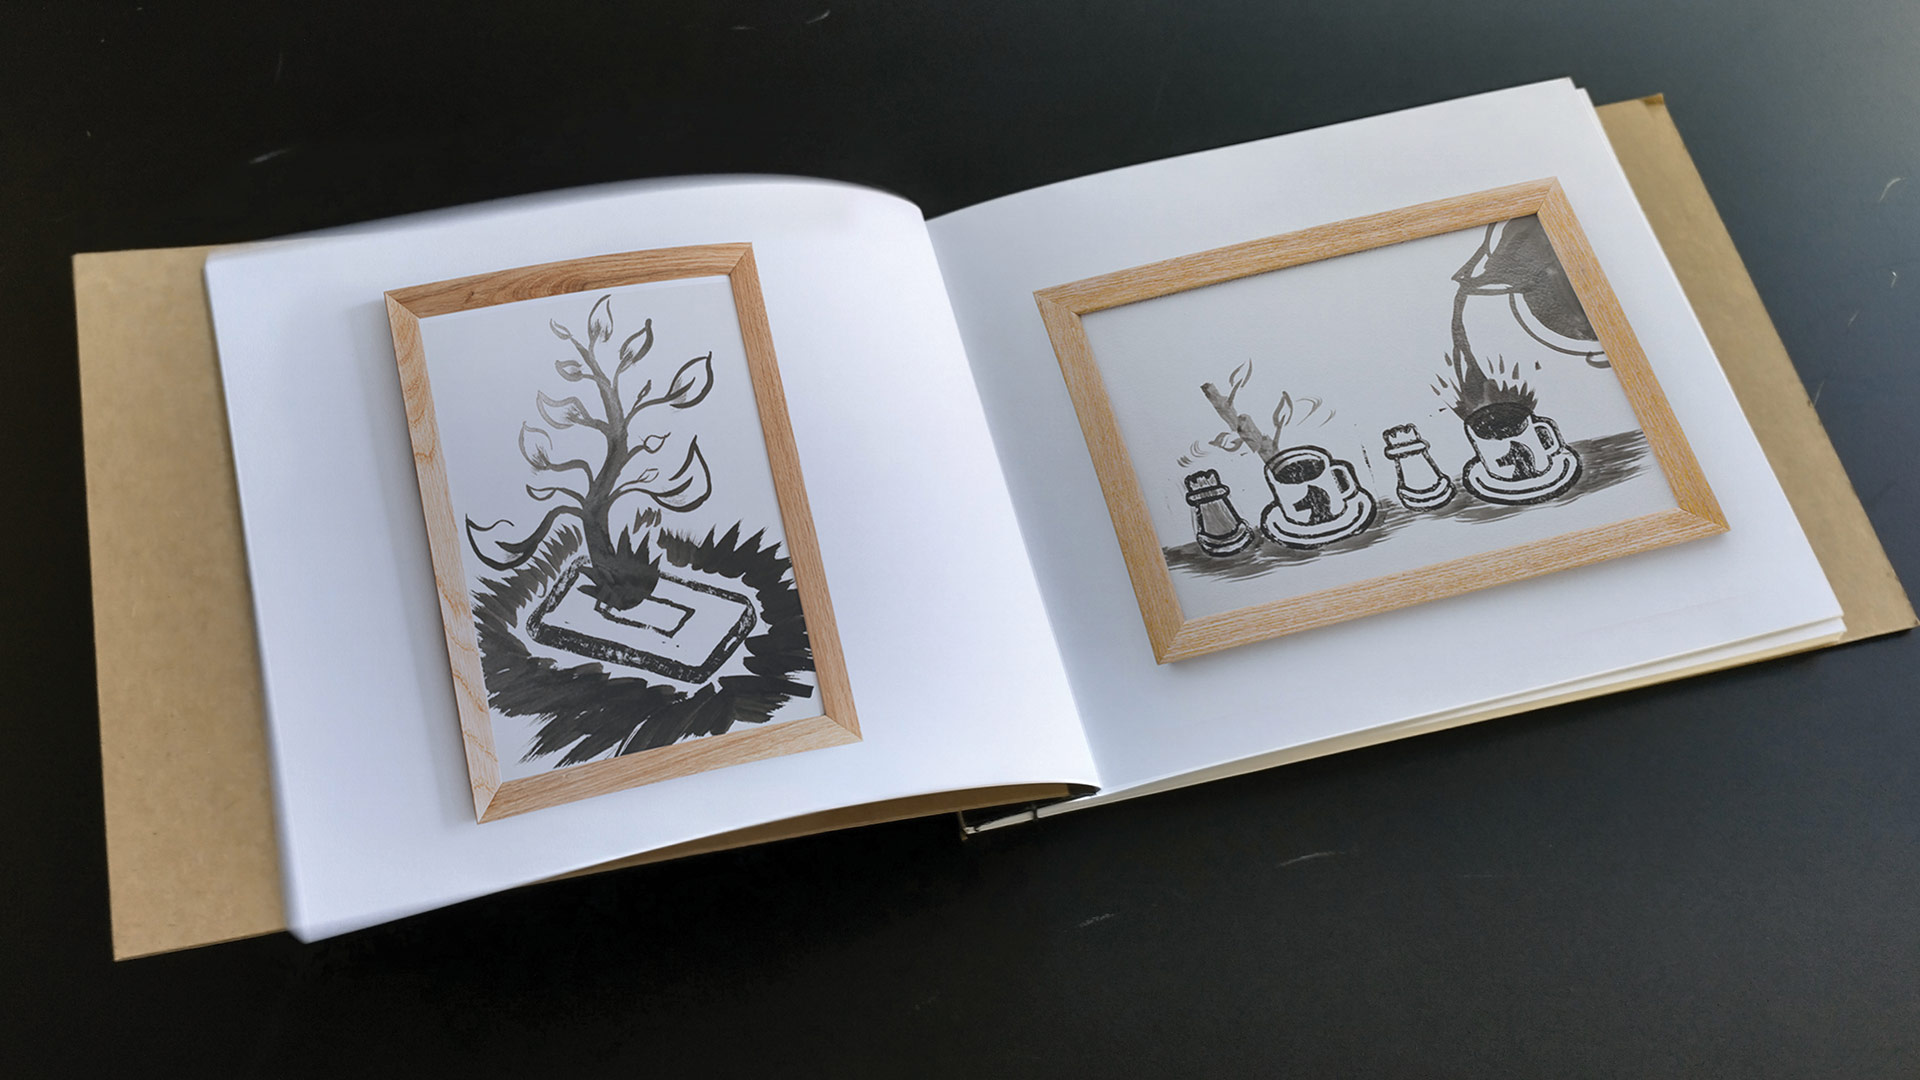
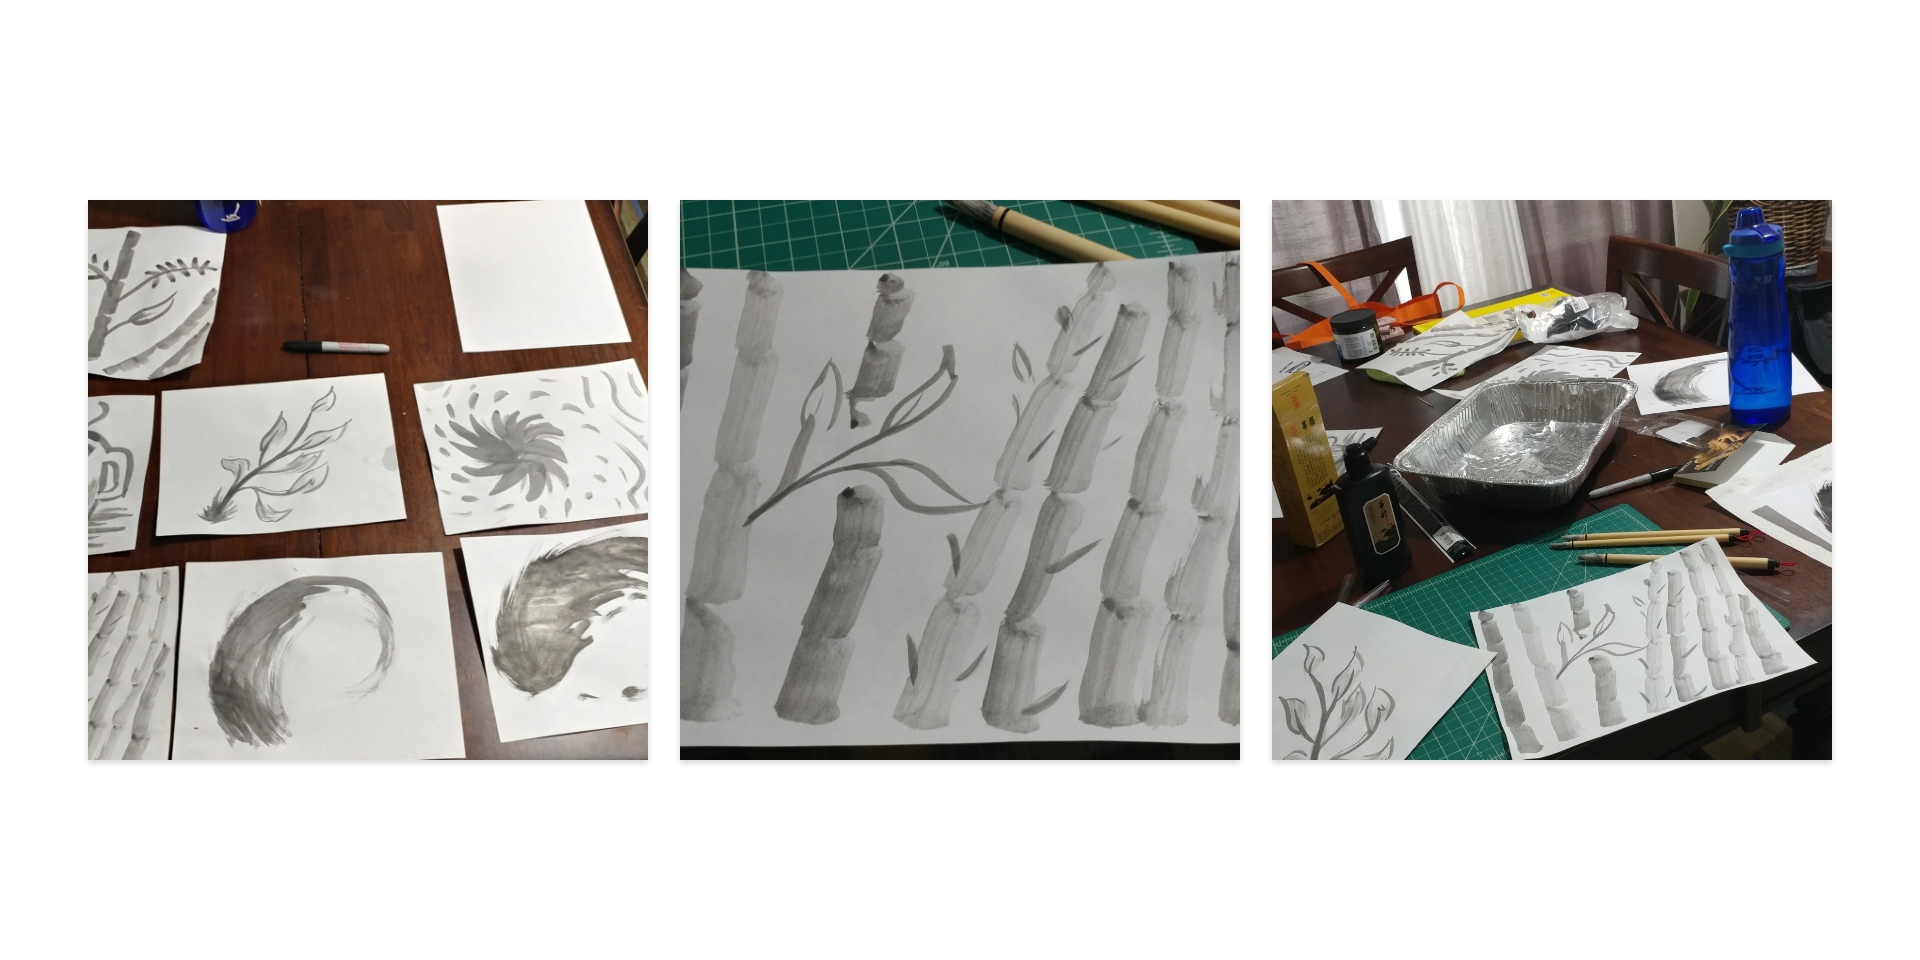
Before adding the Sumi-e ink strokes to my linocut, I began practicing and experimenting with the ink stroke on uncoated sketchpad paper until I was used to it. I generated creations like bamboo, coffee, and tree plants from sumi-e examples.
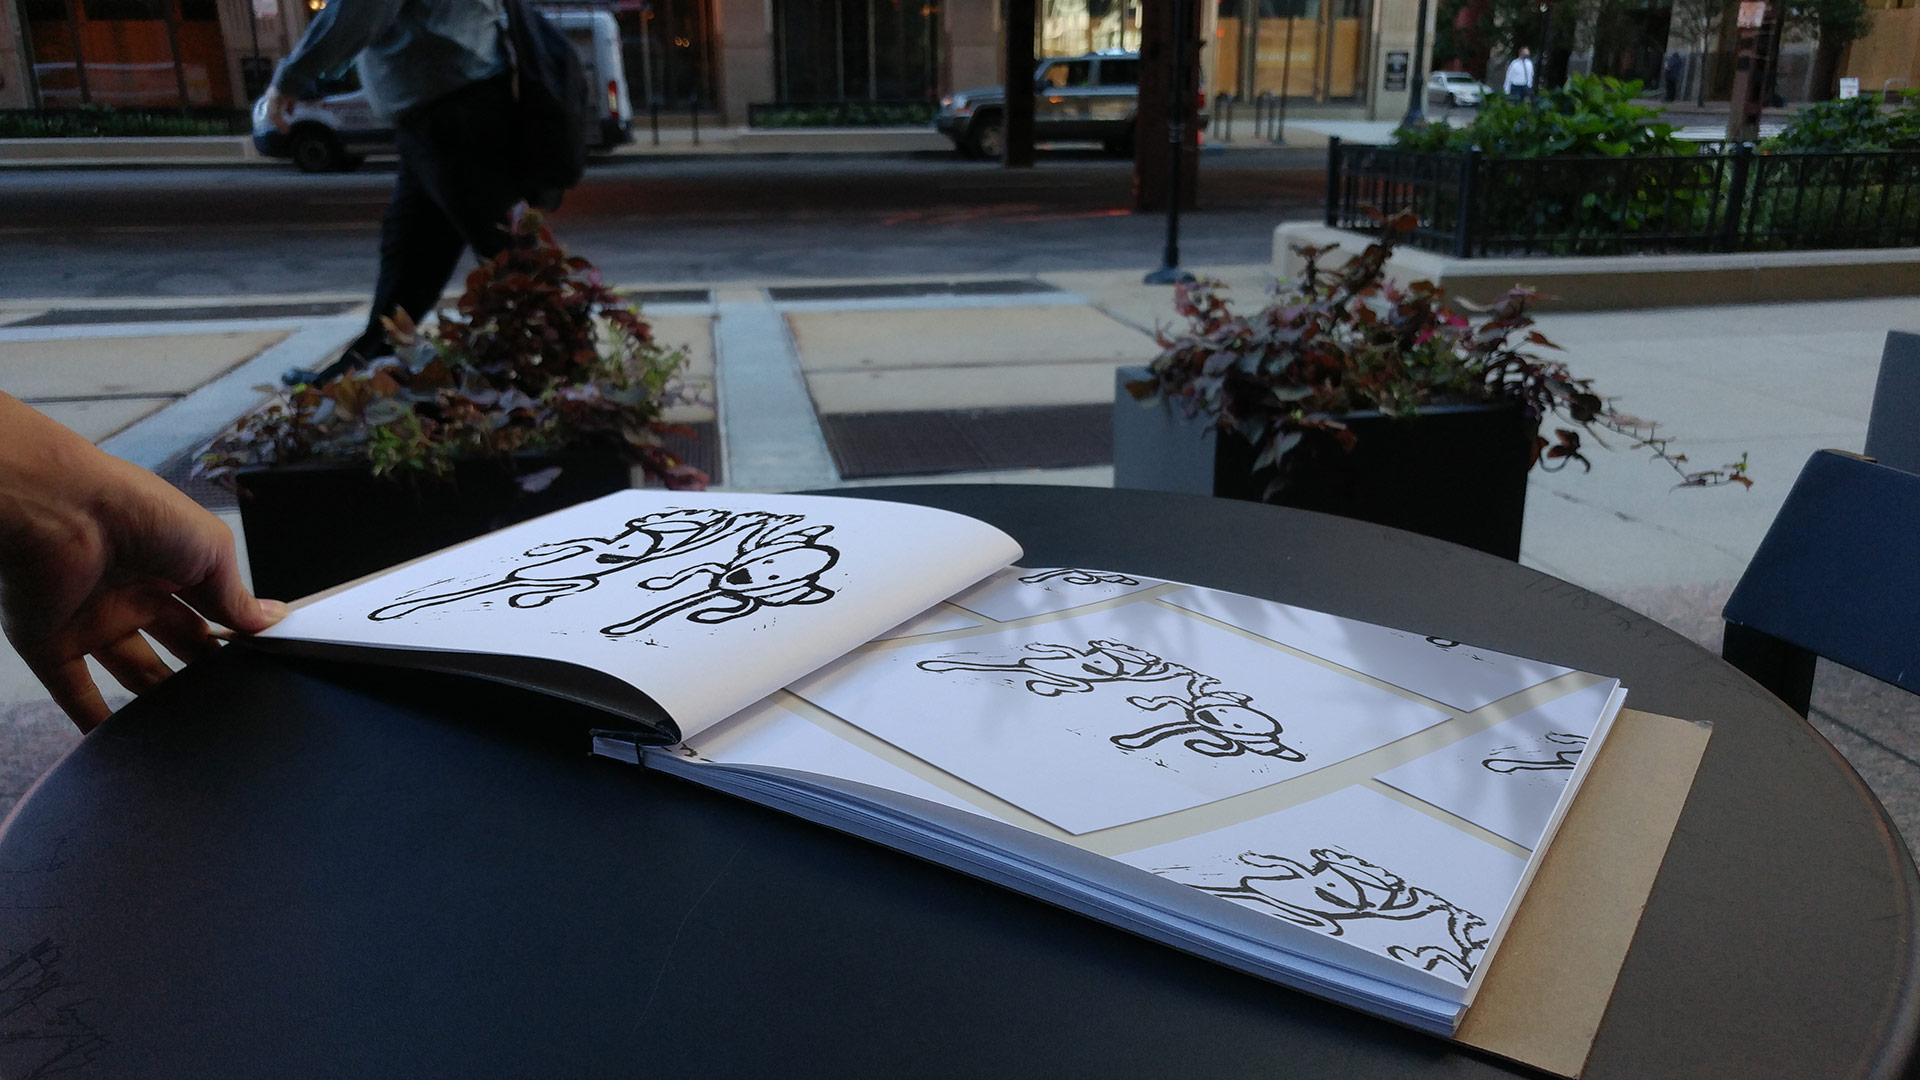
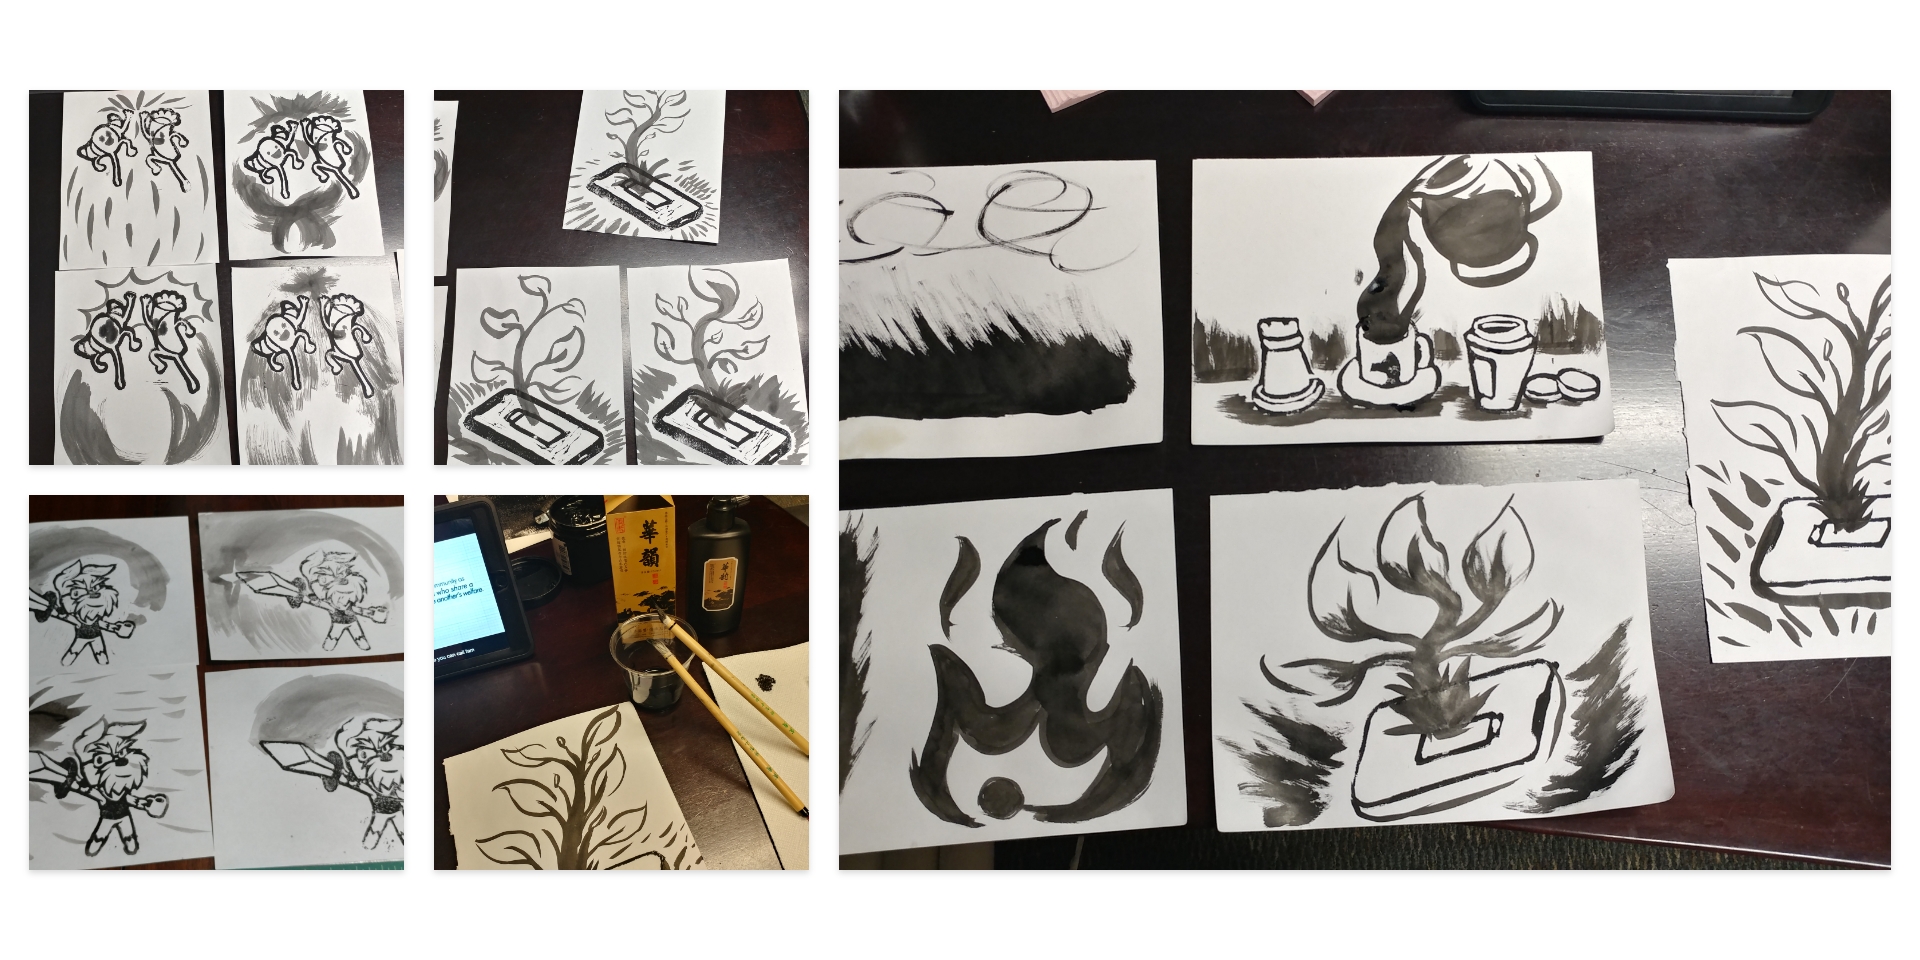
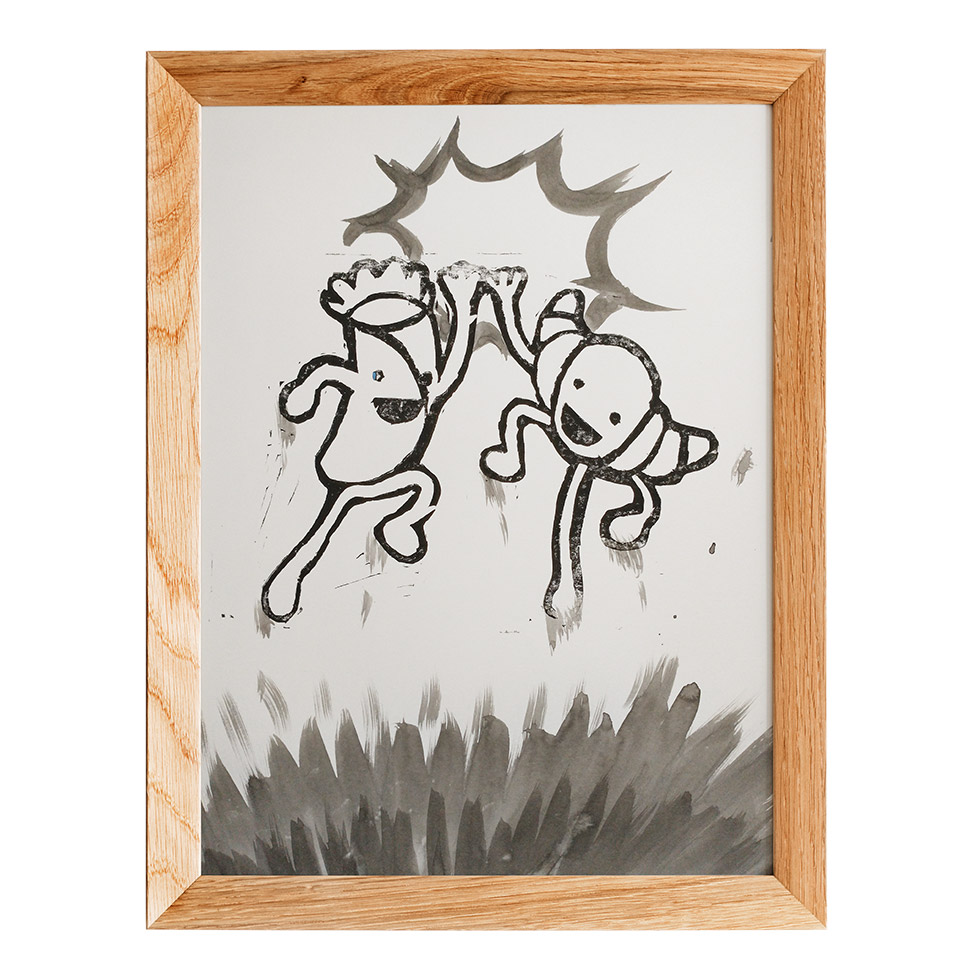
Once I was used to sumi-e ink strokes, I started conceptualizing how I was going to use it on my linocut prints. I used the existing practice prints during the process. The sumi-e ink strokes bring more effect to the linocut prints. The stroke was used as a slash effect on the mascot’s sword, plant growing from the phone for Relax, The clap and high jump effect for the Un Buena Mezcla food buddies, and coffee pouring for the Gather Grounds print.
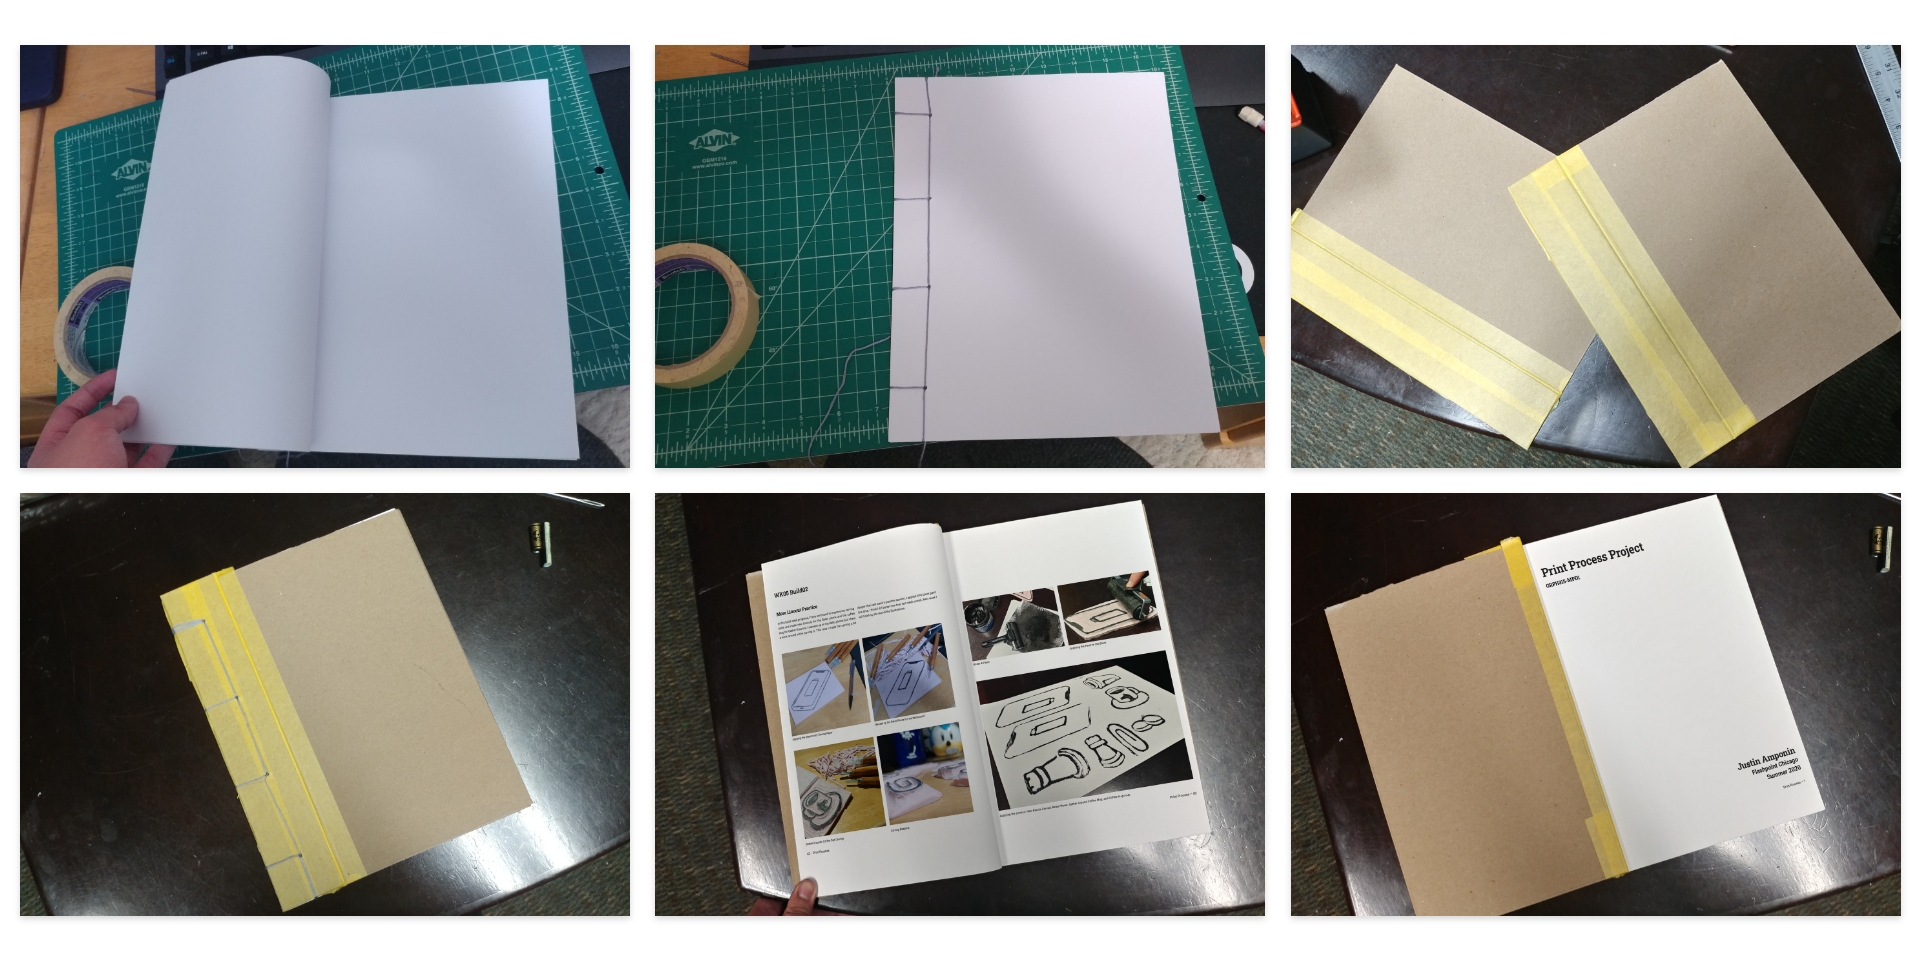
I have done two practice rounds of Japanese stab book binding. The first attempt was using 12 printing papers and no cover. It was a bit rough but I got it to work. The second attempt was using 20 printing pages with chipboard covers. I used yellow masking tape since my black book cloth tape was still being shipped from Amazon. The second attempt is always better than the 1st attempt. I have also produced dummy mockups using some pages of my process documentation with Photoshop.
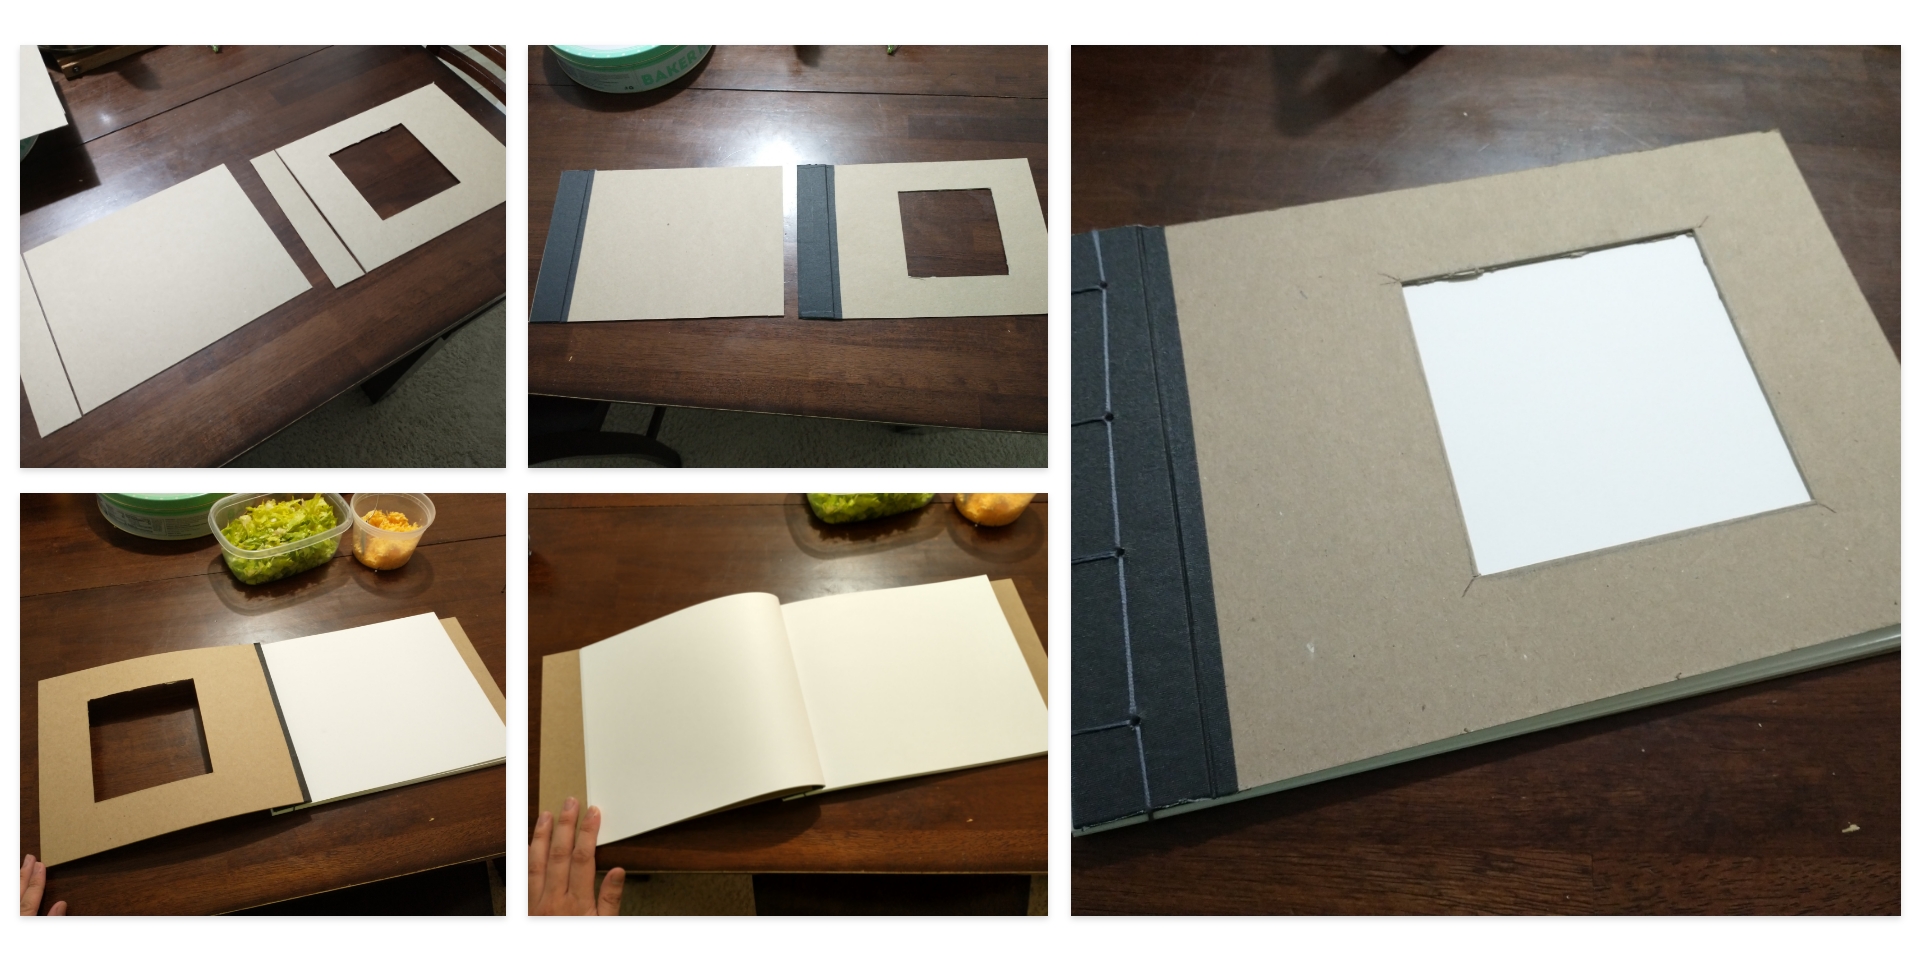
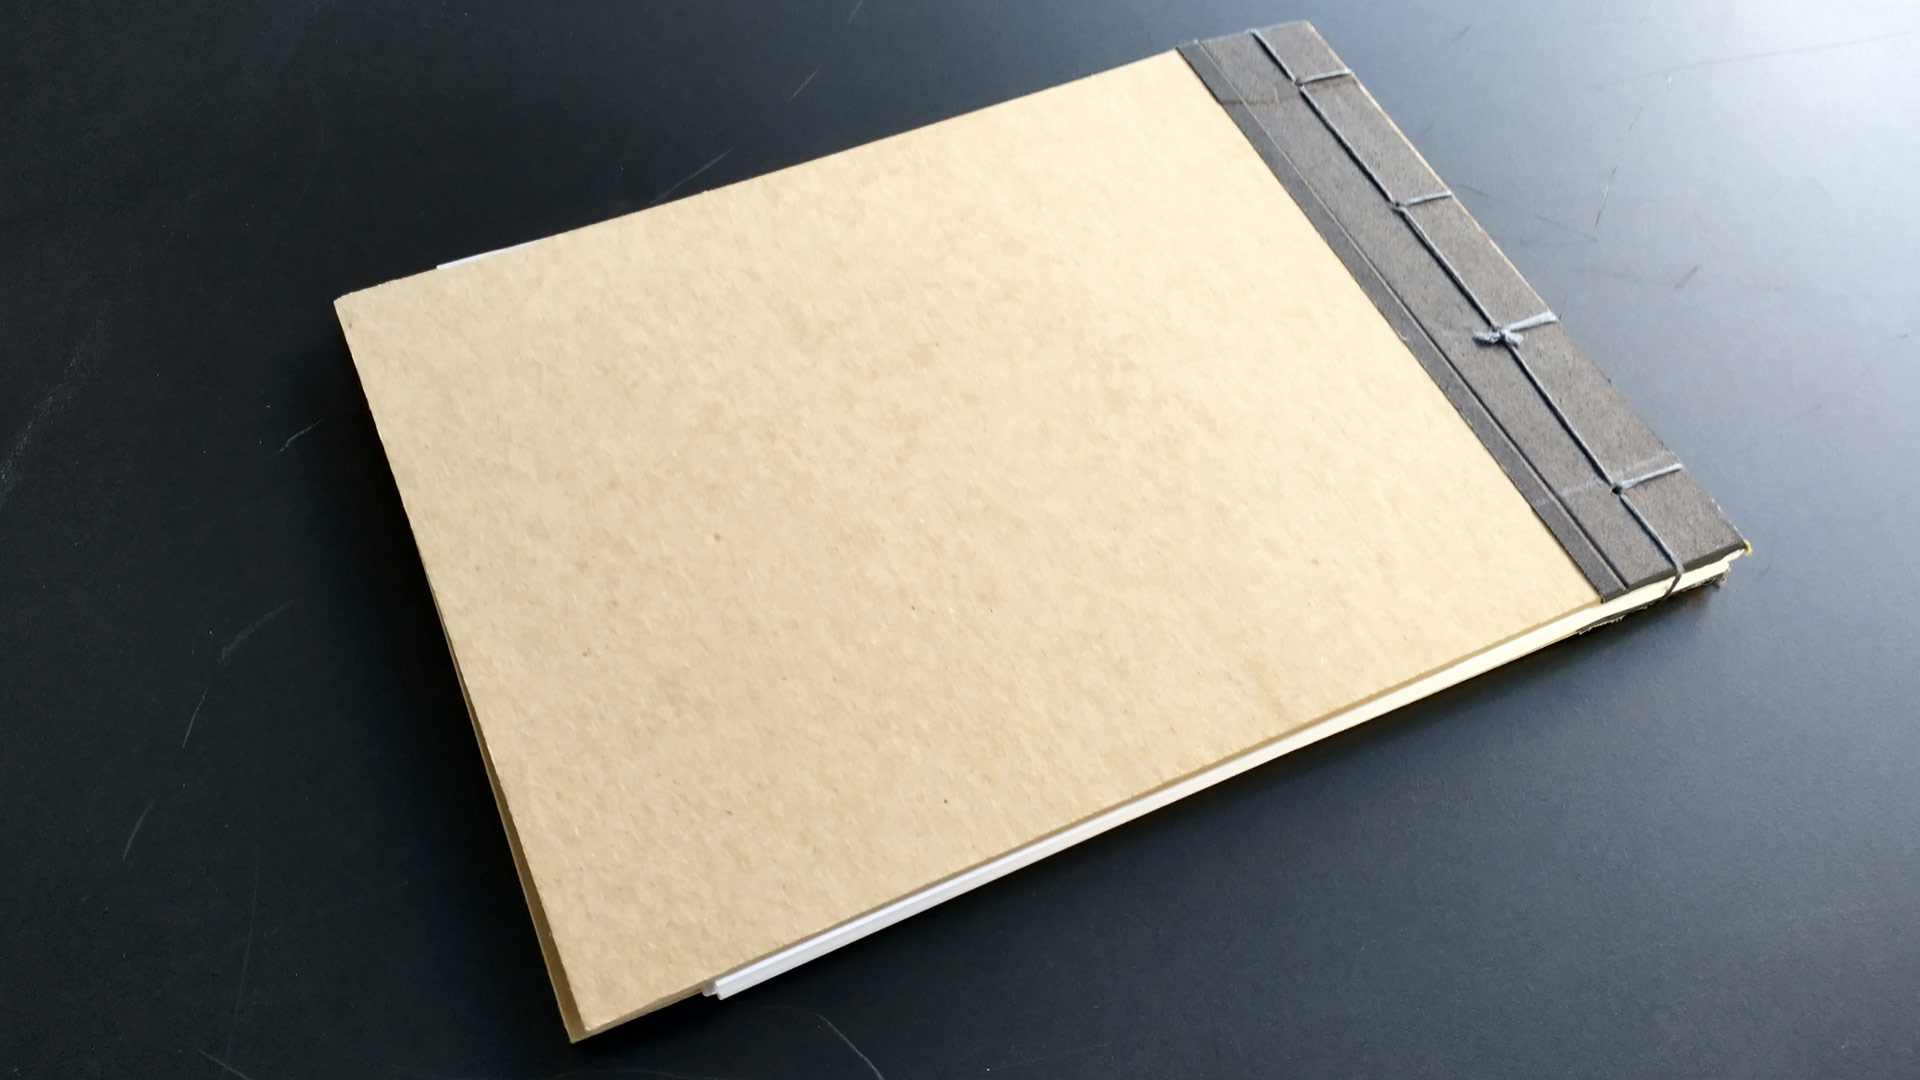
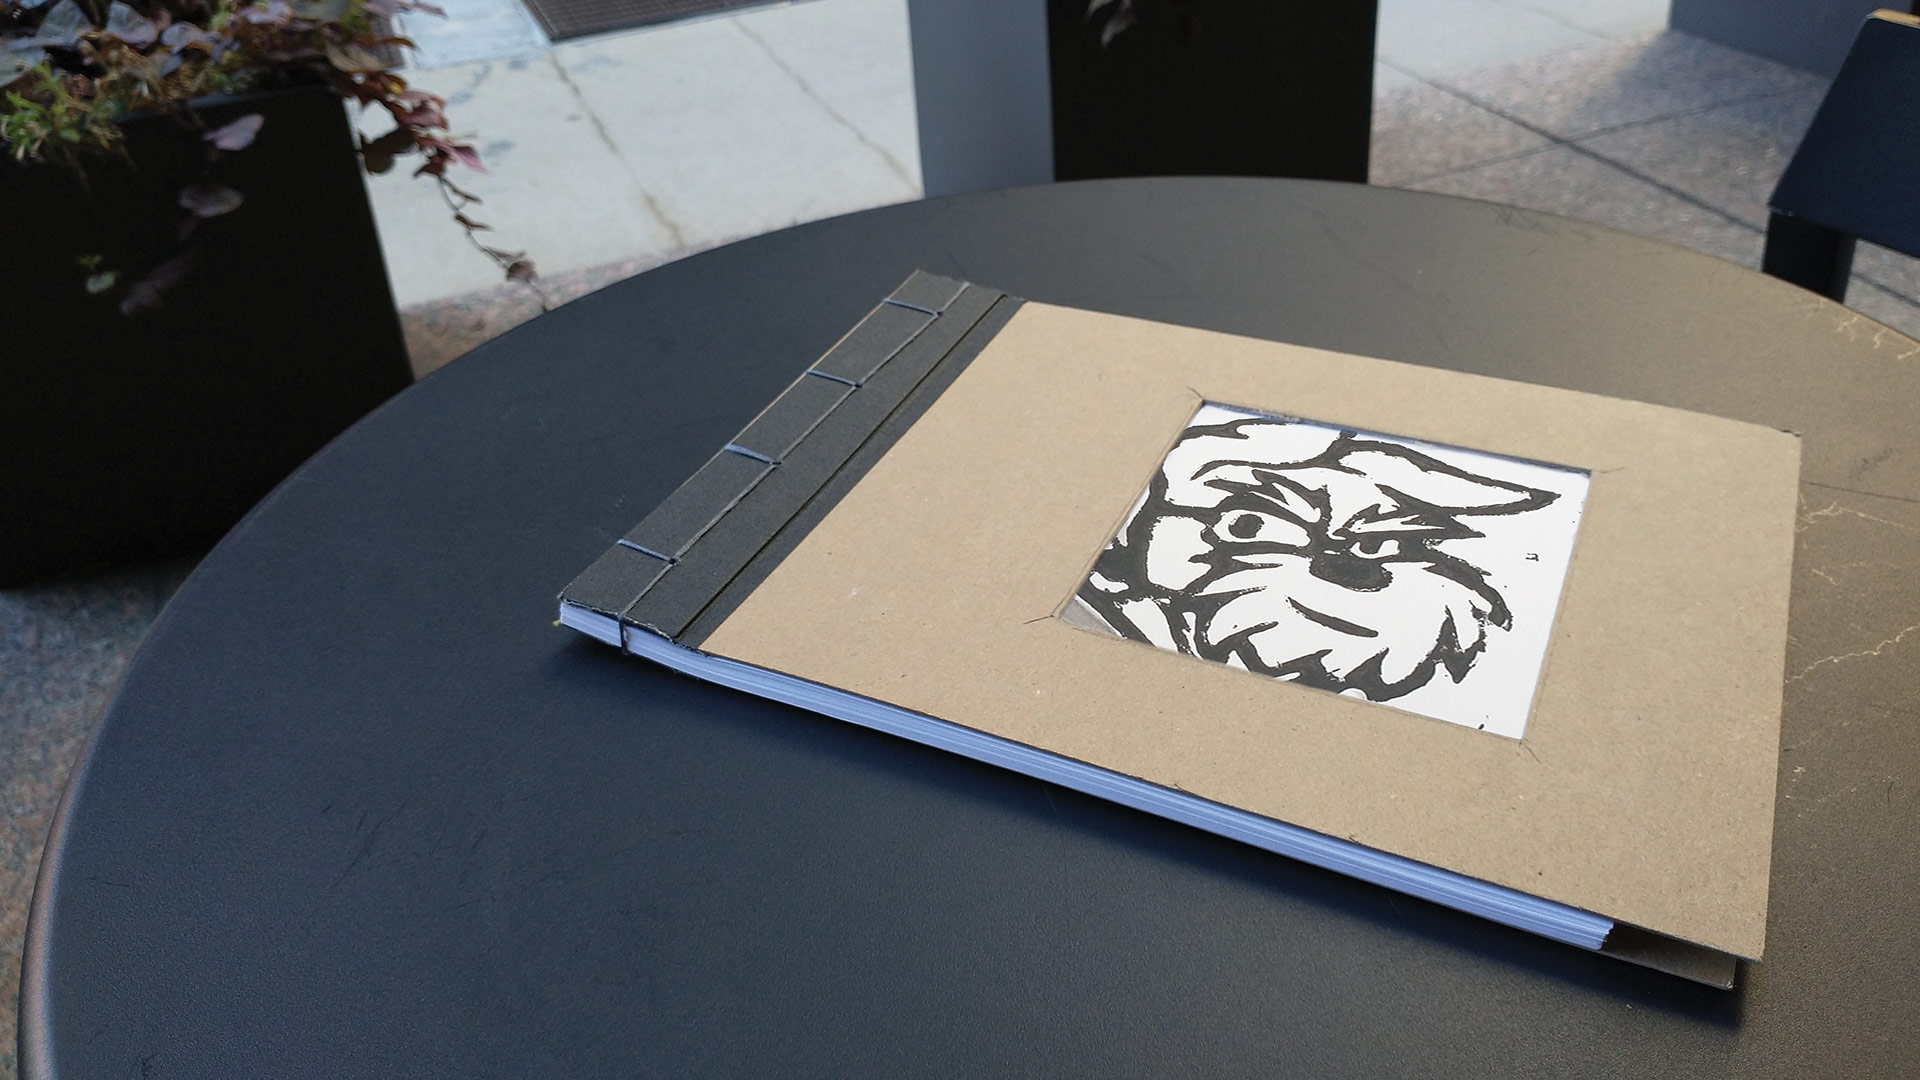
For the final attempt, I will insert 30 print pages to the book as well as using the book black cloth tape. I used an exacto knife to create a cut-on for the cover. My original plan was to print a portion of my process documentation to the book. However, my color printer was jammed and can’t print my process documentation. As a back-up plan, I continued to bind the book with blank pages and then used the documentation page to the blank pages with Photoshop as a mockup.
As my final showcase of my book and printmaking creation, I had an opportunity to commute to Chicago downtown with my sister and take pictures with the book. Again, the book is blank so I have to apply the documentation to the blank pages as a mockup. During my time in downtown Chicago. My sister and I were in the Chicago Loop in the streets of Michigan Avenue and Wabash Avenue in a Starbucks near Roosevelt University.